Latest News

Huntsman Regal with Viper Pro

The (Almost) Lone Ranger

For some airgun hunters, a walk in the woods is not just the pursuit of a pastime but the execution of a critically important role. Take, for example, those entrusted with the protection of fragile pockets of native red squirrels against the threat posed by the grey invader. Or people like Colin Fallows, a ranger charged not with protecting red squirrels, but valuable trees.

As part of a team of three, he patrols a 25-hectare forest in Oxfordshire that is the site of globally funded research projects into techniques to improve the sustainability and cultivation of hardwood species to increase timber production and improve woodland habitat.

Over the last 35 years, more than 60,000 oak, ash, cherry, beech and walnut trees have been planted in the woods, inadvertently providing an ideal habitat for grey squirrels. Their bark-stripping antics wreak havoc and compromise timber values by deforming branches and even killing entire trees.
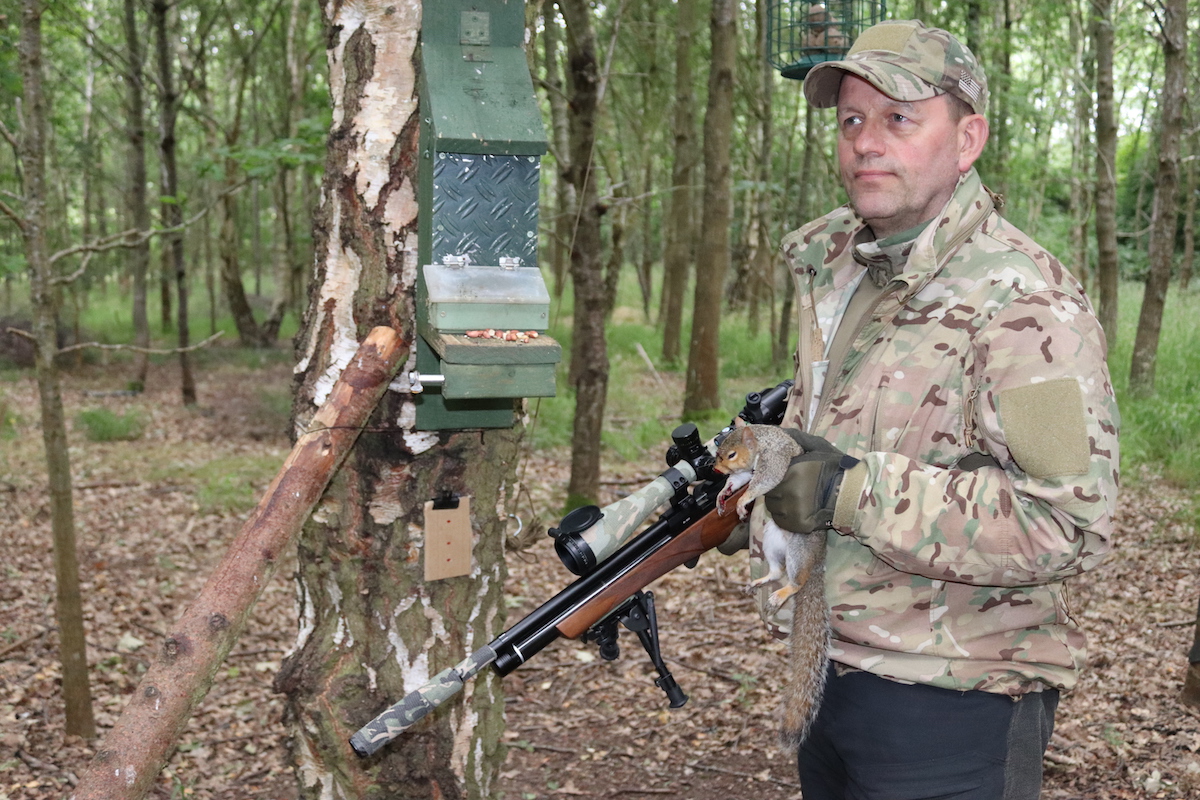
Ranger
When it comes to grey squirrels, using a peanut feeder is an effective control tactic, ensuring the pests come to you and avoiding the need to try and spot them in thick foliage

With professional pest control too expensive, and other control methods dismissed for practical and humane reasons, keeping a check on the squirrel population is entrusted to the rangers and their air rifles.

With the success of costly research projects on the line, and the need to report the number of squirrels he shoots each week, ranger Colin has to make sure that every shot counts. He follows a strict practice regime, spending hours on the range shooting at exactly 16 metres – the distance over which he hunts in the woods.

With so much land to cover, he’s developed an approach in which he erects a small peanut feeder in each new location and monitors it with a trail camera. By using the footage and the frequency with which he has to replenish the peanuts, Colin is able to gauge the immediate squirrel population.

Only when there is evidence of squirrels, and he feels they have come to accept the feeder as a regular source of food they can trust, does he plan his shooting sessions.
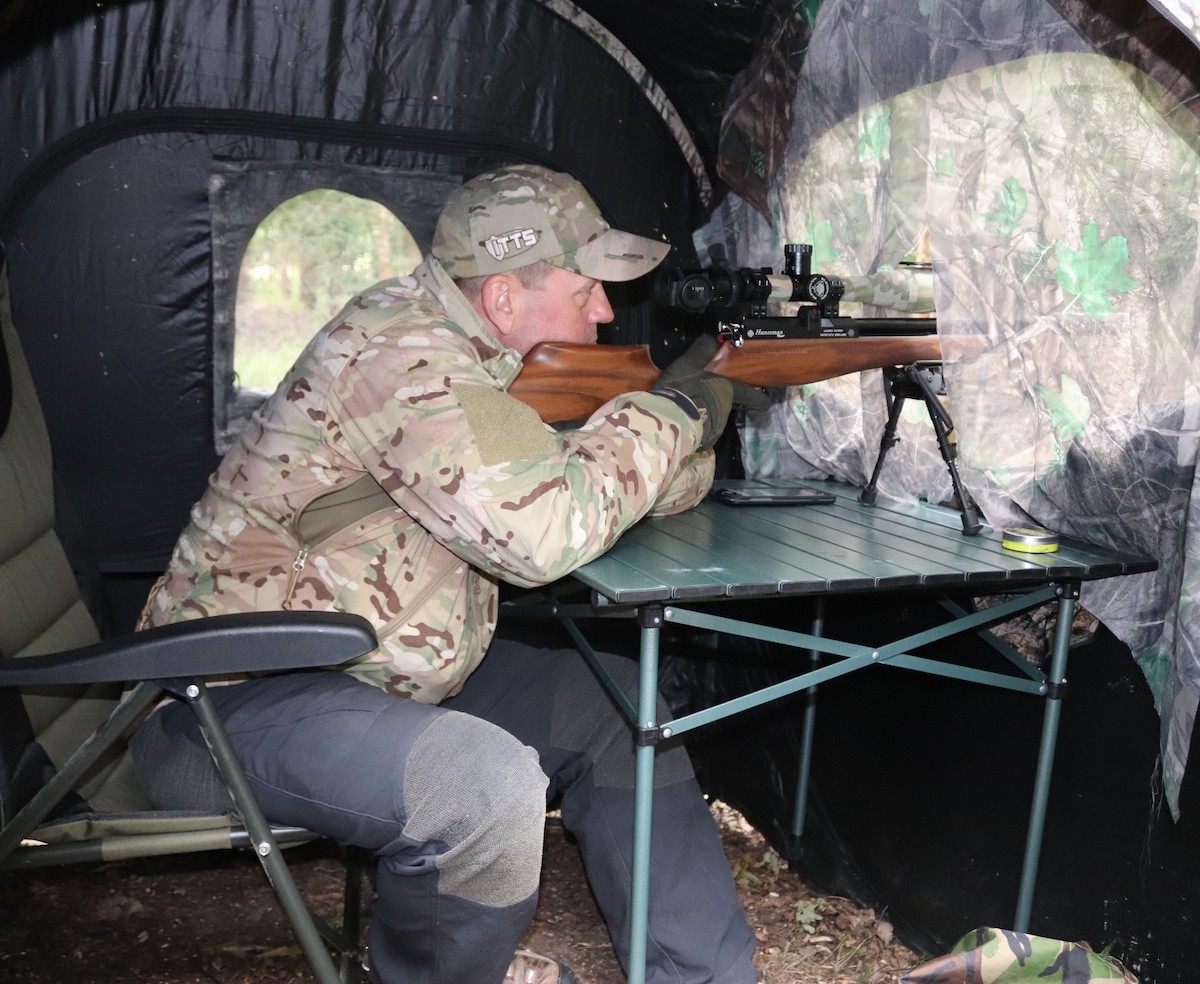
Huntsman in Hide
A few creature comforts makes spending time in a hide a little easier and helps ensure every shot counts

I joined him one morning during the summer heatwave, though it was pleasantly cool when we met at 4.00 am. To maximise concealment, the ranger uses a pop-up hide. Inside he sits on a comfortable fishing chair behind a camping table upon which he places his rifle on a butt rest and bipod. Outside a wind meter feeds information directly to an app on his phone to tell him how much windage to allow for.

Following a procession of birds including Jays, which Colin left alone as they do not damage the trees, and woodpeckers that do but are protected, a couple of squirrels put in an appearance.

It was a little after 5.00am and the sun had barely risen. One of the squirrels held back, high up on a tree, but the other made a direct approach towards the feeder. Sitting in my own hide and armed only with a camera, I sensed Colin waiting for it to climb up the tree and start munching on the free offerings. Instead it began eating the peanuts that had fallen onto the ground.

The ranger waited for the squirrel to select another nut and settle on its haunches to nibble away. I held my breath, waiting for the shot. Colin duly obliged and the whisper quiet cough of his rifle was followed instantly by the meaty impact of the pellet.

The squirrel rolled over, kicked a couple of times and then lay still, hit squarely in the head.

The other squirrel, still up its tree, froze, tail twitching in alarm. I could see the muzzle of Colin’s Huntsman Regal as he tried to find a clear path for his pellet. However, within a few seconds, the squirrel started moving towards us, then went past and up a tree to disappear into the woods.

Though he has shot as many as 17 squirrels in a session, that one proved to be our only success of the day, but as the ranger explained, the relative lack of the squirrels proves that he and his ranger colleagues are doing their job.
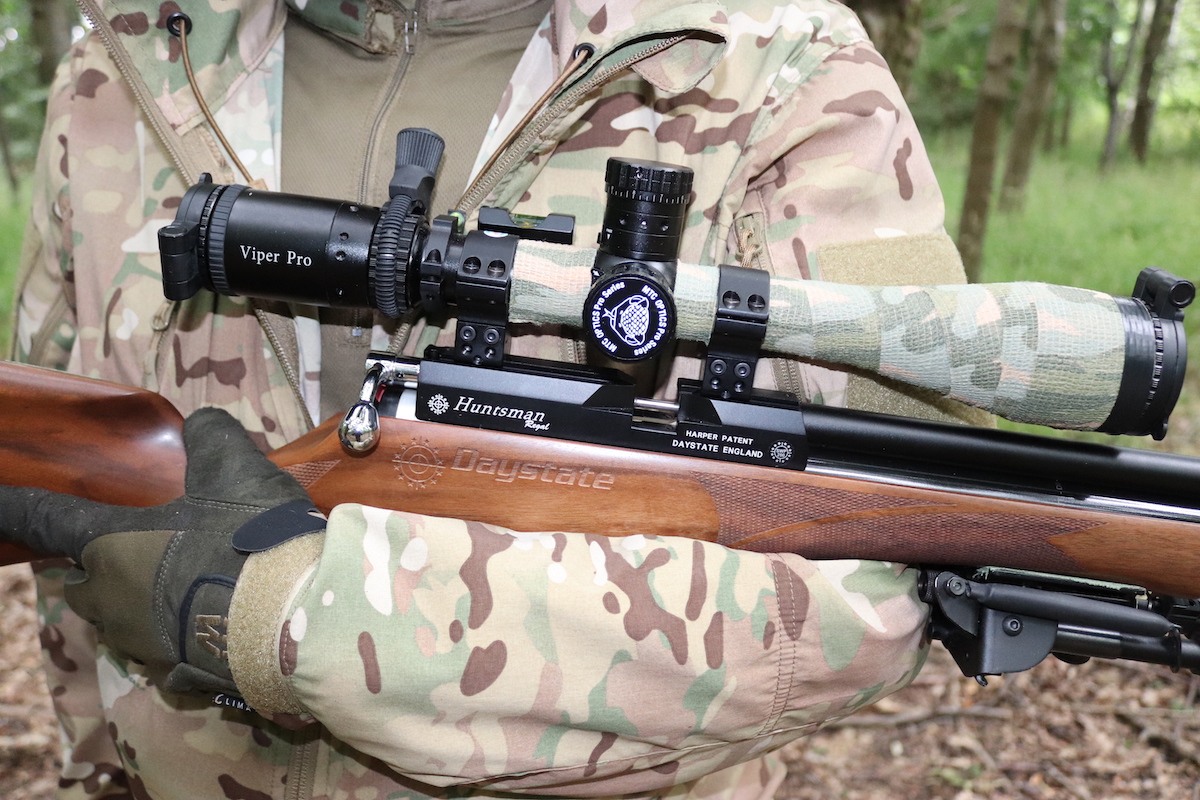
Huntsman Regal with Viper Pro
This Huntsman Regal and MTC Viper Pro combination is playing a vital role in important woodland and hardwood management research
mil bracketing

HOW TO RANGE-FIND WITH MIL BASED CROSSHAIRS

Airgunners may be missing this trick with their mil-dot scopes

Riflescopes that feature a mil-dot reticle are in vogue, with many scope manufacturers developing their own crosshair designs to incorporate ‘mil’ spacings (not always signified by dots). Airgunners favour mil-dot optics primarily because they tie in so well with a pellet’s trajectory, which follows a more pronounced flightpath than a high-powered bullet fired from a rifle. An airgun pellet is also more susceptible to wind drift. With so many aiming points to reference in the sight picture of a mil-dot scope, the airgun shooter can therefore easily make allowances for holdover, holdunder and windage when lining up the shot.

Yet using mil-dots solely for aiming purposes isn’t really taking full advantage of the concept behind the system. Indeed, it’s likely that most airgunners are missing a trick with such scopes.

mil dot reticule
Figure 1. Standard type mil-dot crosshair. The spacing between each dot is equivalent to one milliradian, or 1 mil

The mil-dot system was primarily developed for range-finding in military applications, where bracketing a target between the dots could provide a rough and ready estimation of its downrange distance. While there’s no denying their effectiveness as a multi-aimpoint crosshair for airgun use, the principles behind the system also make it an ideal tool for determining how far away your target is. So, for the airgun shooter, looking down a mil-dot scope offers the best of two worlds: plenty of aiming stadia and an integrated range-finding system!

WHAT IS A MIL?

Mil-dot reticles are so called because they revolve around a unit of angular measurement known as a milliradian, or ‘mil’ for short. One mil equates to 36 inches at 1,000 yards; more easily converted in metric as 10cm (100mm) at 100 metres. Being angular, the measurement value of a mil will change over distance, although its relationship is a linear constant. For example, one mil will equate to 20cm at 200m (double that of the 100m measurement), 5cm at 50m (half that of the 100m measurement) and so on.

For most airgun shooting scenarios, distances are commonly 50 metres and below, but the mil-dot system still translates well. The table in figure 2 shows the benefit of working in metric values; if you wanted to know the value of a mil at 25 metres, for example, it doesn’t need much brain power to work out that it would be 25mm!

Mil Chart
Figure 2. The measurement of a mil is dependent on distance, but it’s easy to remember!

Besides dots, mil measurements are often represented by short stadia incorporated into the crosshair’s design, giving the shooter a kind of ruler to measure by. As there are advantages to measuring in smaller increments, advanced reticles like MTC Optics’ SCB2 and AMD also offer the shooter measuring marks in half-mil steps. By halving the measurement reference of a mil, smart crosshairs like MTC’s provide an even more precise aiming and range-finding system.

BRACKETING

If you know the size of your target, you can quickly gauge its distance by simply ‘bracketing’ it between the mil (or half-mil) marks on your scope’s reticle and taking a note of how many of these it spans. Conveniently, you can undertake this as part of the aiming process, making it a speedy affair.

Take this scenario as an example (figure 3). You’re lining up on a bird pest, perched on a branch an unknown distance in front of you. The bird measures approximately 200mm from beak to branch. So, because it ‘brackets’ between a five-mil spacing on your MTC scope’s SCB2 graduated crosshair, you can confidently estimate its range to be 40 metres. How? Through a dead easy formula: target size divided by mil spacings. In other words: 200mm divided by 5 mils… equals 40m.

mil bracketing
Figure 3: Using the bracketing system in conjunction with the SCB2 crosshair on this MTC Optics scope indicates the crow’s range is (200 ÷ 5 =) 40 metres. The hunter can then take aim using the appropriate aiming mark on the reticle

Take another example – a feeding rabbit. You approximate the top of its body to be 150mm off the grass and can bracket it between three mil spacings. So, 150 ÷ 3 = 50; the rabbit is around 50 metres away. Handily, you can then select the aiming dot or stadia relevant to that distance on your scope’s crosshair to allow for holdover. Easy!

The half-mil system comes into its own for much smaller targets, such as the ‘kill area’ of a knock-down silhouette, where bracketing measurements need to be far more precise. As such, half-mil reticles are favoured by outdoor competition shooters, though the range-finding calculation is the same.

Suppose you are aiming at a metal silhouette with a 12mm diameter ‘kill’ disc. If you can bracket the disc between a single half-mil spacing, then the distance of the target from you must therefore be 12 ÷ 0.5 = 24 metres. Likewise, if you can bracket it between three half-mil spacings (i.e. 1.5 mils), then its range must be 12 ÷ 1.5 = 8 metres (figure 4).

mil bracketing
Figure 4: The more precise half-mil markings of MTC’s SCB2 crosshair are useful for smaller targets. The 12mm diameter inner ‘kill’ of this knock-down may look tricky, but at least you know the target’s exact range – 12 ÷ 1.5 = 8 metres!

Given how easy the milliradian formula is, making a spur of the moment range calculation is quick as well as accurate. However, why not print off the table in figure 5 to keep in the pocket of your shooting jacket for an always-at-hand reminder?

table
Figure 5: Assess the size of your target to then easily estimate its range based on the number of mil spacings it can be bracketed by. The quick calculation is: distance (mtrs) = target size (mm) divided by number of mils

BRACKETING WITH ZOOM SCOPES

As simple as the mil bracketing system is to range-find with, there is something to be aware of if you have a variable power scope: the focal plane where the scope’s reticle is located. Scopes fall into two types, those where the reticle is in the first focal plane (FFP) and those where it is in the second focal plane (SFP) – see here.

With a FFP scope, both the target size and reticle remain in proportion to each other, regardless of the magnification you set. Therefore, you can use the bracketing system to range-find your target on any magnification with these scope types.

However, with a SFP scope, you can only accurately use the bracketing system on one magnification setting: the ‘true’ power. Though this is often 10x magnification, it can vary between scope manufacturers and models, so it’s an important number to know on your own telly. If, for example, your scope’s mil-dot crosshair is ‘true at 10x’, but you always shoot on 12x power, you will have to wind down the magnification to 10x when range-finding using the bracketing method.