Latest News

Hunter’s favourite adds a practical stock with target appeal for even more versatility.

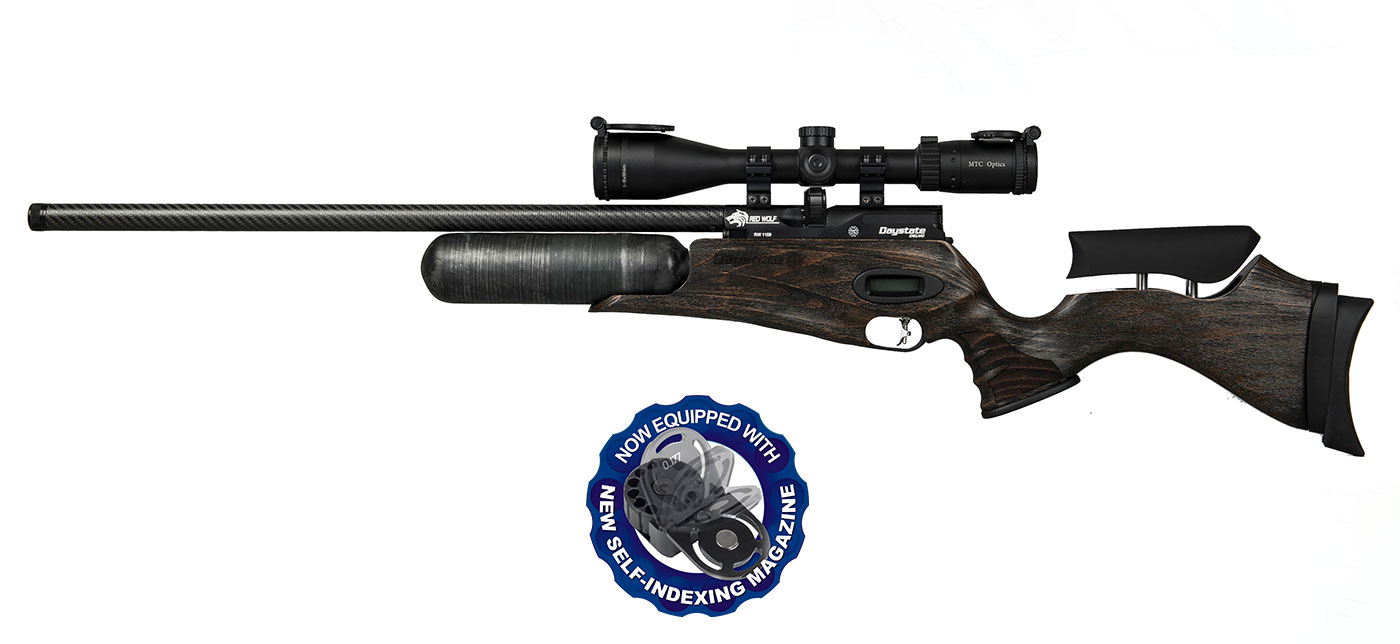
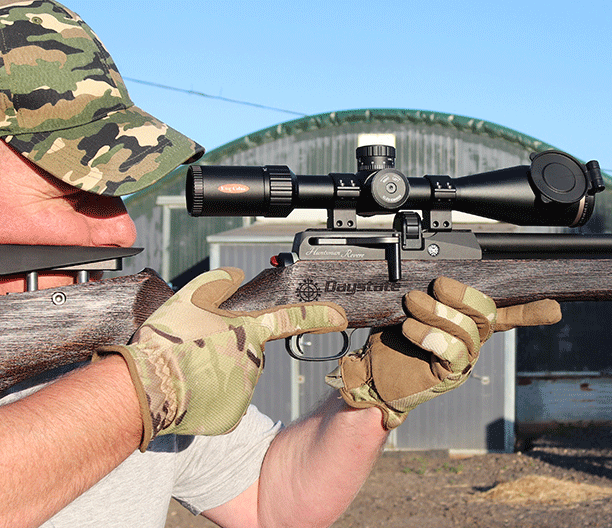
The new Safari Edition Huntsman Revere incorporates Daystate’s tactile, raised-grain stock with height adjustable cheekpiece, increasing this classic model’s appeal both to hunters and target-minded shooters

Classic sporter looks, a sleek design and a lineage tracing back to Daystate’s inception over 40 years ago: the Huntsman series is iconic and has remained a firm favourite with field shooters the world over. The latest, Huma-Air regulated Revere sets performance levels good enough to entice precision-minded target shooters too, and this has led to the development of the new Safari Edition – a Huntsman offering added practicality and versatility for field and range shooters alike.

The Safari Edition features Daystate’s tactile, raised-grain wood stock. Ambidextrous and incorporating a lower-seated action that’s been a hallmark of the Huntsman’s design for years, the ‘high-grip’ advantages the textured Safari stock brings are further enhanced by stippled panels to the grip and forend. Combined with its natural camouflage look, it has all the perfect attributes for the field.

However, the Safari Edition’s stock has been subtly tweaked to also accommodate the needs of target shooters, without compromising the Revere’s inherent sporter feel. A rise-and-fall cheekpiece allows perfect eye alignment for both varmint and target-styled scopes – and its comb is finished in a soft-feel rubber for extreme comfort in all conditions and shooting disciplines.

The Safari stock’s forend has been shaped to suit all holds and disciplines, too, with a broader shape and flatter base to assist those preferring to shoot off a bench. Its weight-relieved construction will appeal to hunters with large permissions to trek across, though stud-points have been incorporated for those who want to fit a sling, bipod or other shooting aid. The scalloped butt is as practical as it is aesthetic, ensuring good balance in the shoulder for hunters, and making the ideal anchor if shooting off a benchrest or bean bag.

Action-wise, the Safari Edition keeps all the attributes that have made the Huntsman Revere Daystate’s biggest-selling rifle: a factory-installed Huma-Air regulator, sidelever cocking – user swappable for right- or left-hand use – that keeps cocking effort minimal even on the 40ft/lb model, self-indexing magazine with new loading gate (with a single-shot loading tray supplied for those who prefer to manually feed their pellets), probe-charging with integral rotary dust cover, shrouded match-grade barrel with threaded muzzle, adjustable two-stage trigger with manual safety catch and a tough, anti-glare metal finish.

Available in gun shops from the end of July 2022, the new Safari Edition of the Huntsman Revere melds sporting and target elements in perfect harmony. The classic Daystate that always offered perfect combination of performance, handling and style now just became even more versatile.

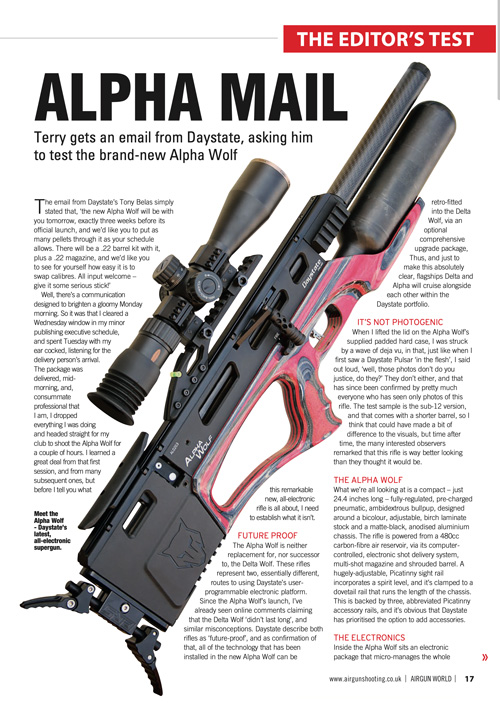
Terry gets an email from Daystate, asking him to test the brand-new Alpha Wolf

he email from Daystate’s Tony Belas simply stated that, ‘the new Alpha Wolf will be with you tomorrow, exactly three weeks before its official launch, and we’d like you to put as many pellets through it as your schedule allows. There will be a .22 barrel kit with it, plus a .22 magazine, and we’d like you to see for yourself how easy it is to swap calibres. All input welcome – give it some serious stick!’ 

Well, there’s a communication designed to brighten a gloomy Monday morning. So it was that I cleared a Wednesday window in my minor publishing executive schedule, and spent Tuesday with my ear cocked, listening for the delivery person’s arrival.The package was
delivered, mid-morning, and, consummate professional that I am, I dropped everything I was doing and headed straight for my club to shoot the Alpha Wolf for a couple of hours. I learned a great deal from that first session, and from many subsequent ones, but before I tell you what this remarkable new, all-electronic rifle is all about, I need to establish what it isn’t. 

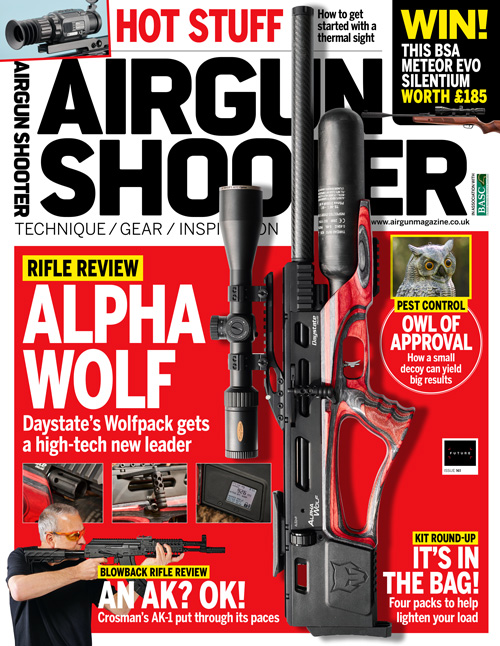
Daystate’s Wolfpack gets a high-tech new leader

Daystate refuses to stand still when it comes to pushing the boundaries of airgun design. The British gunmaker set a new standard for adjustability when it launched the electronically tunable Delta Wolf two years ago. Resting on its laurels has never been a trait of this airgun giant, and further advances on the theme were inevitable. Those advances have now been unveiled in the shape of the Alpha Wolf – the latest addition to Daysate’s hi-tech digital pack.

Taking Stock

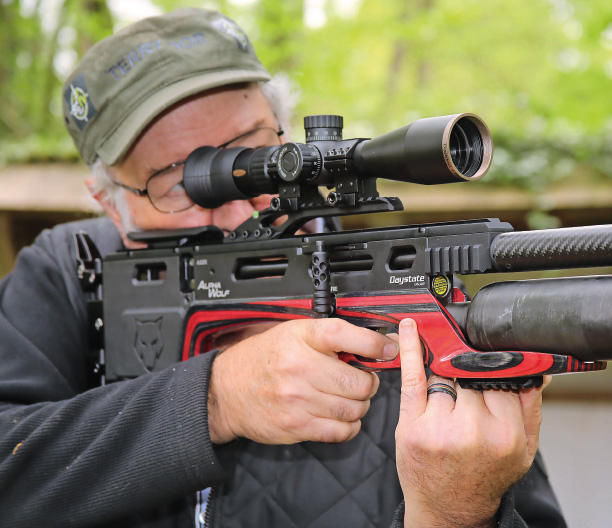
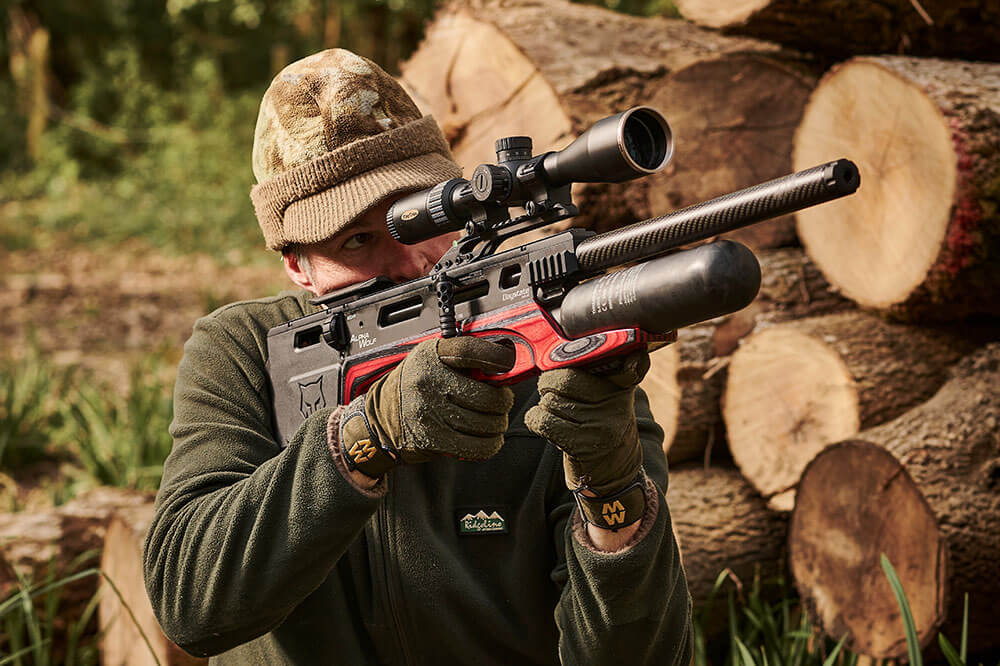
Before we delve into the Alpha Wolf’s electronic wizardry, let’s run through its exterior form and aesthetics, many features of which are just as impressive as its digital internals. One criticism levelled at the Delta Wolf (unfairly in my opinion, as you can only go so far with tactical styling) was that it didn’t look very different from other bullpup offerings. That most certainly is not the case with the Alpha Wolf, which is a real head-turner.

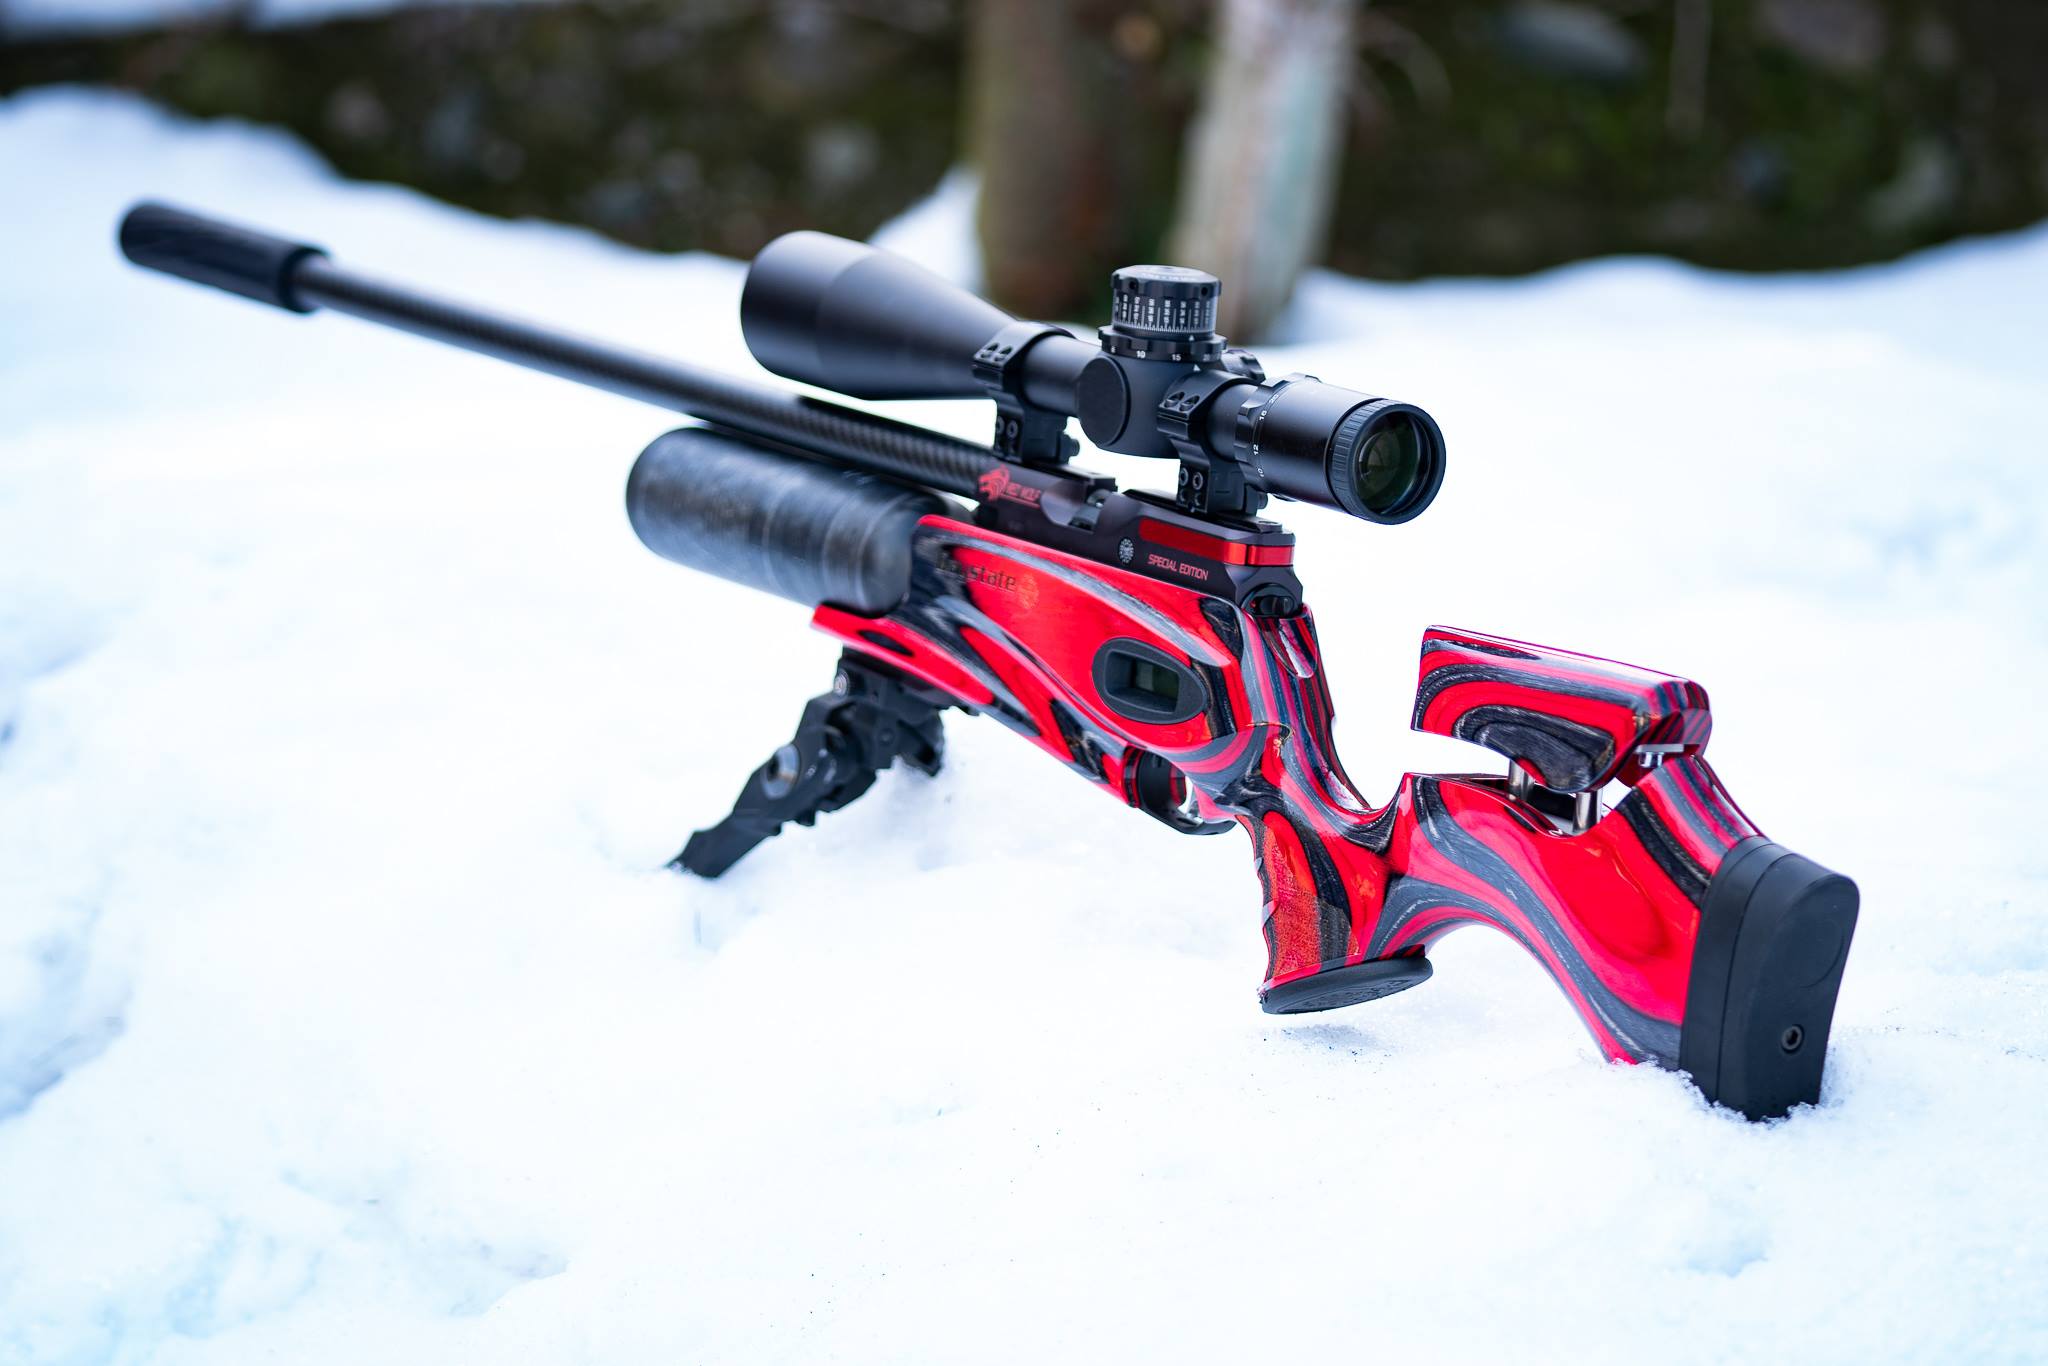
Rather than going dark and moody with the Alpha Wolf, Daystate has chosen a look-at-me glossy red and grey laminate thumbhole, in tones reminiscent of the Rosso variant of their awesome Red Wolf. It may not be to everyone’s taste, but even if you don’t like it you can’t help but stare. This is a gun that demands attention, even before you get a taste of its remarkable performance. For those of you who like something more subdued, I wouldn’t be surprised if a toned-down option were to follow fairly soon.

Apart from giving aesthetics a different twist, the laminate section of the stock also serves as a very comfortable ambidextrous handle. The generous thumbhole cutaway leads into a steep, chunky and nicely sculpted pistol grip, which gives excellent trigger attack and features crisp stippling on both sides. The underside of the forend sweeps sufficiently far forward that I didn’t find myself having to grab the bottle with my leading hand. It is also handily equipped with a 75mm Picatinny accessory rail for a bipod.

Safari ART on the 100 yard test range

STATE OF THE ART (UPDATED)

What does ‘ART’ stand for?

ART stands for Daystate’s Accuracy Research Team – a selected group of developers, testers and engineers from the UK and US. Guided by a strict approval and testing protocol, their role is to improve, wherever possible, the accuracy and performance of Daystate’s new and existing products.

Doesn’t Daystate already have such a program in place?

Yes, and always has had. However, the new ART program supersedes this and has been developed as part of the company’s ongoing quest to maintain its reputation of producing the world’s finest air rifles. By labelling a product as ‘ART-approved’, shooters can be assured they are using the most advanced airgun technology currently available.

Polygonal vs normal rifling
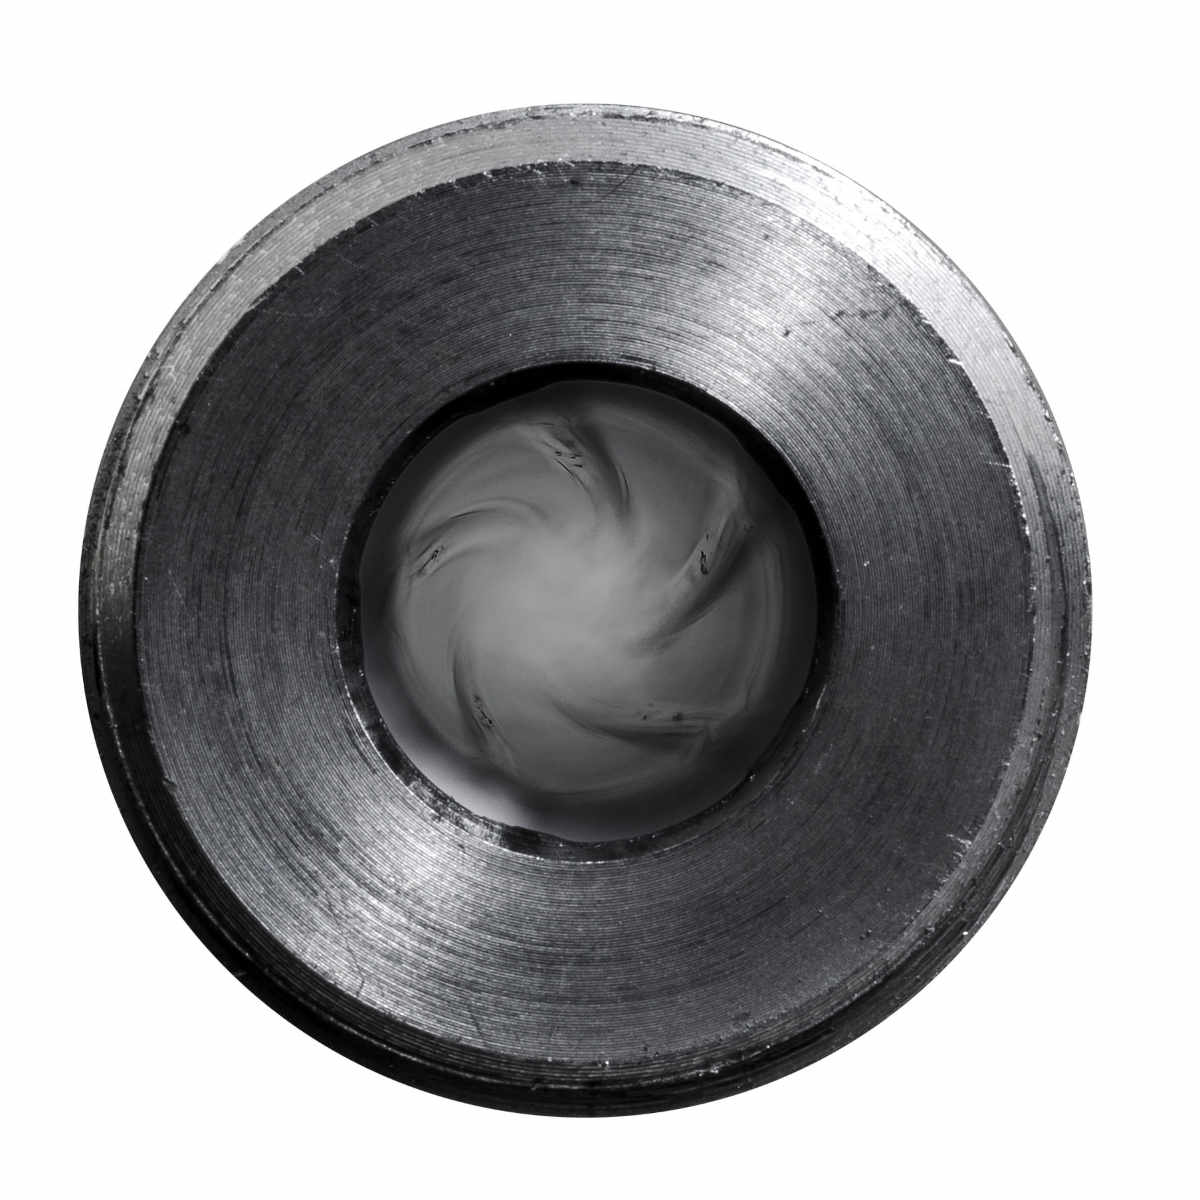
The .25 ART barrel has a polygon profile: the difference between conventional and polygon is shown here

What will be the first ART-approved guns or gear?

The ART program has initially been focussed on improving barrel performance of Daystate’s high-power air rifles fitted with 23” (60cm) barrels. With the extreme high-power levels that many Daystate models can now achieve – upwards of 65 ft/lbs in the case Red Wolf Safari – comes the opportunity to shoot over much greater distances. The goal of the ART has therefore been to improve long-range accuracy.

Daystate Polygonal ART Barrel
This is an actual barrel after a 1000 pellet test – without cleaning. The dark areas are lead build-up at the muzzle

Will all high-power Daystate PCPs now be fitted with ART-approved barrels then?

Using the latest pellets manufactured by JSB, ART found that it was able to improve both accuracy and overall performance to an unprecedented level on extreme high-power models in .25 (6.35mm) calibre.

However, the ART’s research into the accuracy and performance of Daystate’s high-power PCP in .177 (4.5mm) and .22 (5.5mm) calibres concluded the performance of current, factory-approved barrels reached a very high standard demonstrated by the excellent results achieved by high-power models throughout 2018 in competitions such as Extreme Benchrest and the US FT Championships (to name but a few).

Safari ART on the 100 yard test range
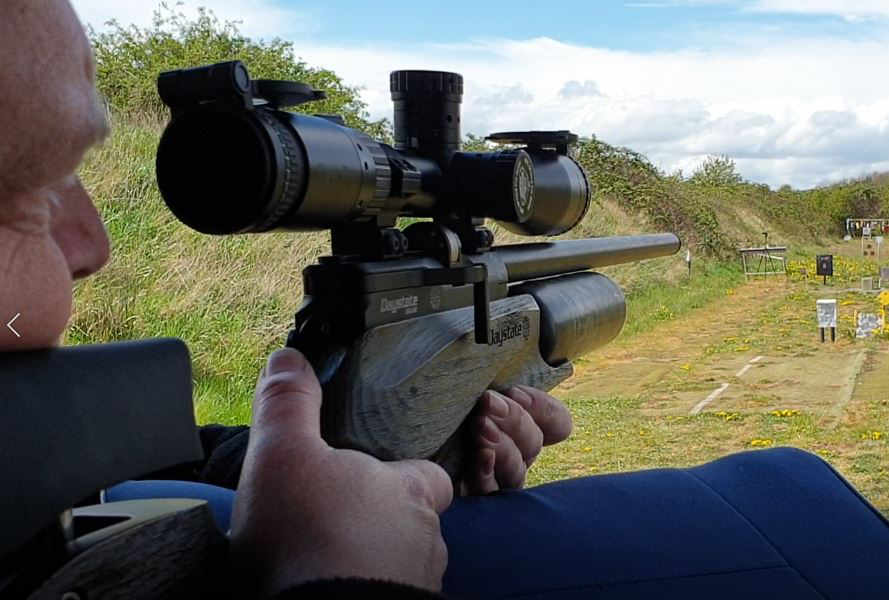
Safari on the new ART test range at Tinsley Park, Nottingham.

What about .303 calibre barrels?

The ART programme is still evaluating the performance of the current .303 calibre barrel that Daystate uses on its high-power models. The forthcoming Red Wolf Safari is set to produce an unprecedented 80ft/lbs of power output (up from the current 70ft/lbs) in .303 and only when the team is happy with the result will the Safari be released with a .303 ART barrel.

Safari ART 100 yard test
Initial testing returning good results at 100 yards

What about lower-powered Daystate PCPs – will they get ART barrels?

The shorter, 17” (43cm) match-grade barrels that Daystate fits to various models rated from sub-12 to 45ft/lbs power output have a different internal profile and spin rate compared to high power barrels. They offer excellent accuracy, so are not currently under scrutiny.

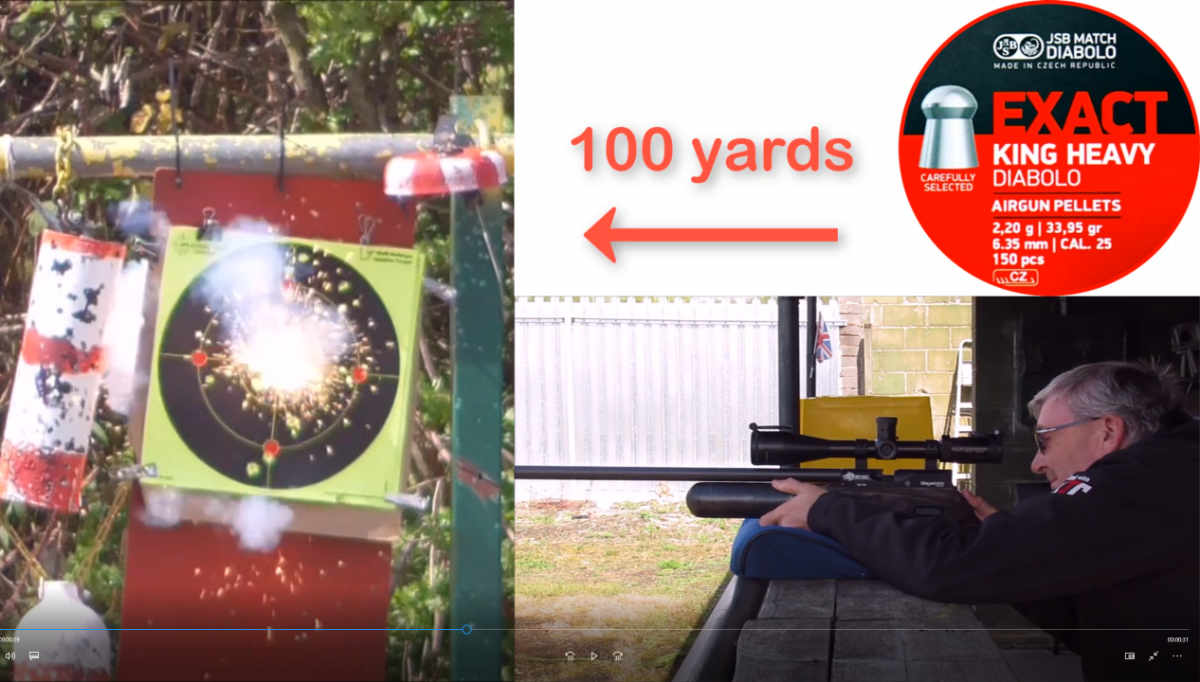
The team had a bit of fun at the end of a days’ testing by putting out a single exploding target – the testers were only allowed one shot each to hit it. The distance – 100 yards of course!

But could I buy an ART barrel for my current Daystate if I wanted?

Yes, subject to availability and through an approved Daystate dealer. However, the only ART barrel currently available is the 23” (60cm) version in .25 (6.35mm) calibre, fitted as standard on the extreme high-power Red Wolf Safari.

Hunters who stay in because it’s cold outside are missing out on a vital time to keep grey squirrels in check, as Mat Manning explains…

Airgun hunters in the UK can make a massive contribution to conservation by controlling grey squirrels, and they should be doing it right through the year.

Much fuss is made of the damage this destructive introduced species has caused to our fragile native population of red squirrels but its impact on other indigenous wildlife is too often overlooked. Grey squirrels predate on the eggs and chicks of songbirds, and their habit of dominating natural food supplies is almost certain to be harmful to dormice. Add that to the wildlife habitat depletion and massive cost to the forestry industry (hundreds of millions of pounds every year) caused by grey squirrels’ relentless bark-stripping, and it’s a classic example of the unforeseen upset that so often occurs when an alien species is introduced to an ecosystem.

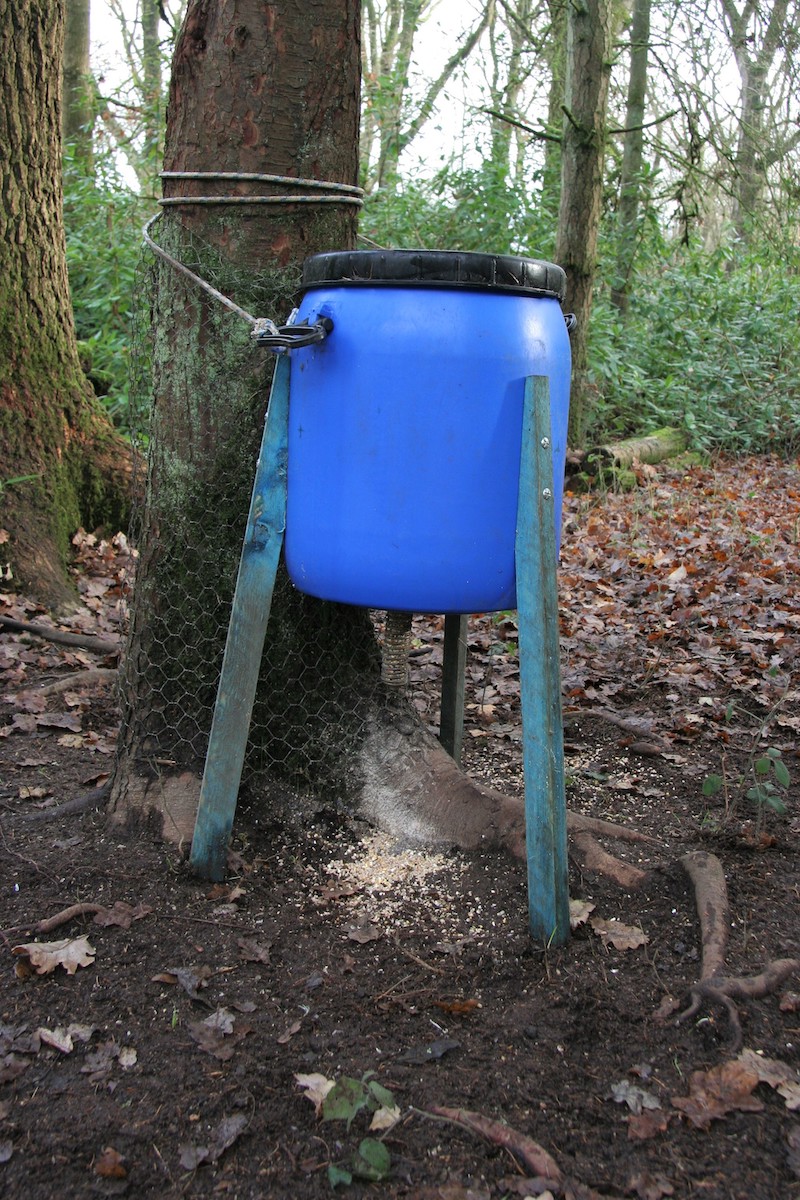
The humble pheasant feeder can be a serious attraction to squirrels during winter.

Winter is one of the best times for keeping grey squirrels in check. Ignore what some people say about these rodents hibernating through periods of cold weather – it’s nothing but a myth. Grey squirrels don’t like getting wet but they do venture out in sub-zero temperatures. In fact, cold weather should improve your chances because it puts an edge on squirrels’ hunger and makes them even more inclined to spend the daylight hours foraging for food.

Setting up a feeding station is a great way to optimise your winter hunting time by drawing squirrels to a predetermined spot. And you don’t even have to set up your own hopper if you share your ground with a game shoot because pheasant feeders act like a magnet to squirrels.

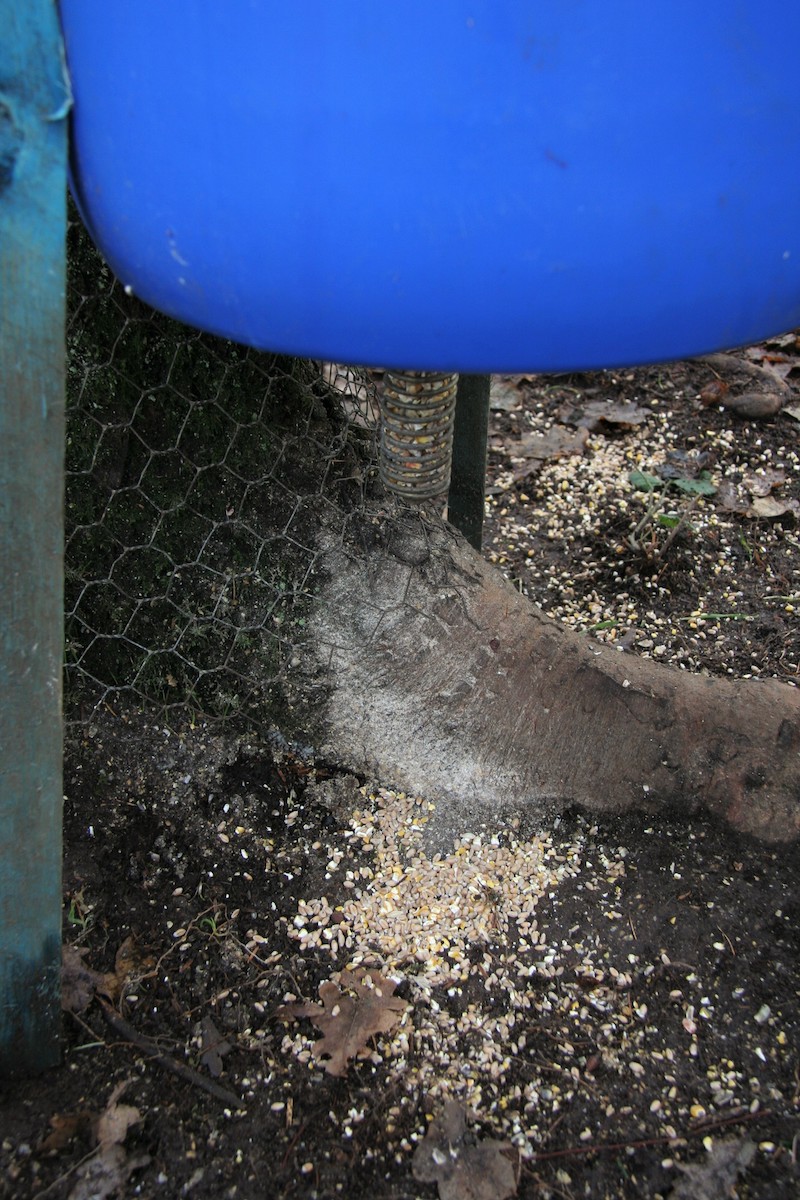
It’s not difficult to understand the appeal. Gamekeepers tend to put out most feed during the winter months – right when natural food is starting to run low. Squirrels are notoriously greedy and soon home in on easy pickings, so grain put out to stop pheasants from straying is simply irresistible to them.

Squirrels soon home in on an easy meal, and that includes grain put out by gamekeepers.

I managed to bag a few squirrels by targeting a pheasant feeder earlier this week. I was actually out checking up on my own peanut-filled feeding stations when I spooked not one but two squirrels from beneath one of the gamekeeper’s hoppers.

My feeders had only been set up for a few days and the squirrels had yet to take much of an interest in them. However, I wasn’t going to pass up on the opportunity to nail one or two around their more established feed sources.

I had my Daystate Red Wolf slug over my shoulder. Although it’s an adult-sized air rifle, it is deceptively light, which makes it perfect for carrying around on my woodland rounds. And it’s always useful to have it close to hand in order to make the most of chances like this one.

It was a cold day and I felt confident that the squirrels I had spooked from the feeder, and hopefully one or two more, would soon be back for another munch. I didn’t have any hide-building gear with me, although I didn’t really think I needed it. Squirrels are usually quite bold when they’re distracted by an easy food source, and I also felt that the disturbance caused by building a makeshift hide would do more harm than good.

With the squirrels distracted by rich pickings, Mat was confident that natural cover would provide sufficient concealment.

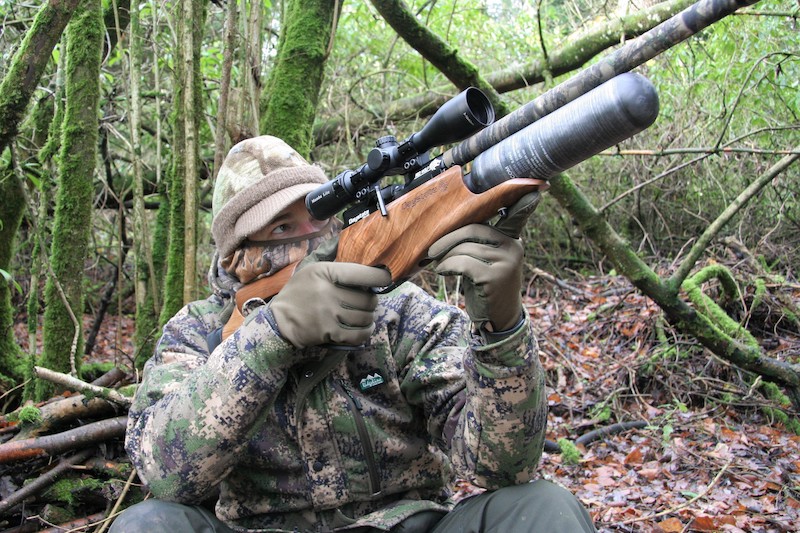
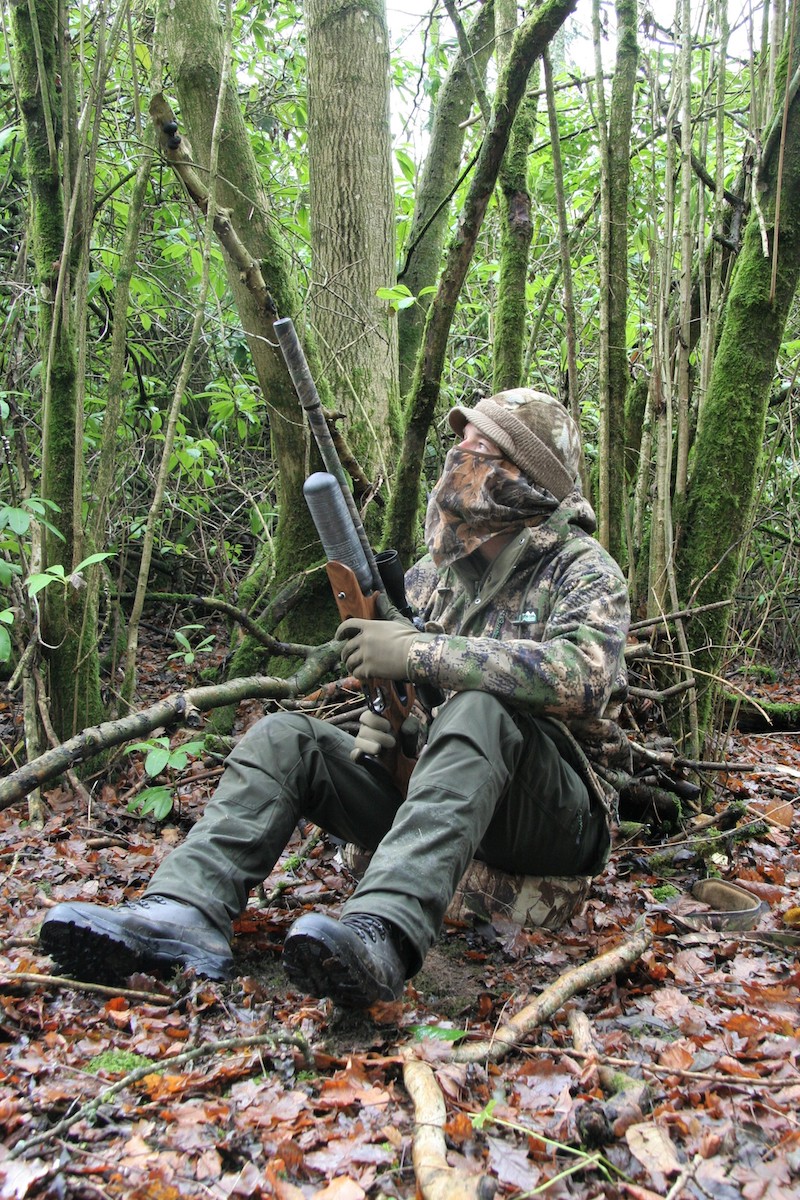
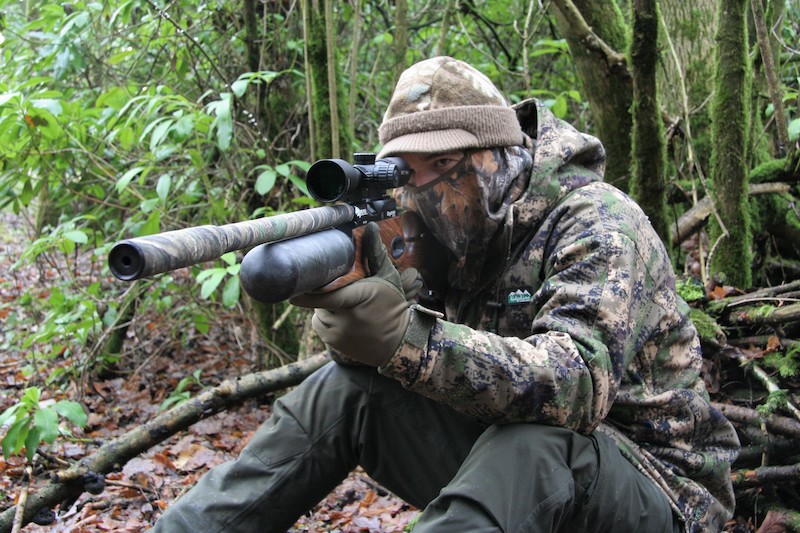
Relying on natural cover to keep me hidden, I settled down into the undergrowth about 25 metres from the feeder. I was sure that the undergrowth and dappled shade would be sufficient to keep me concealed from incoming bushy-tails, although I did put on a headnet to cover up the pale skin of my face.

The ruse worked, and it wasn’t long before a squirrel decided to put in an appearance. I was watching a robin scratching up grain from beneath the feeder when it suddenly fluttered off into the rhododendrons and began to utter an alarm call. Seconds later, my eye caught a flash of silvery grey as a squirrel slipped down a tree trunk close to the feeder and scuttled over to dine on the grain.

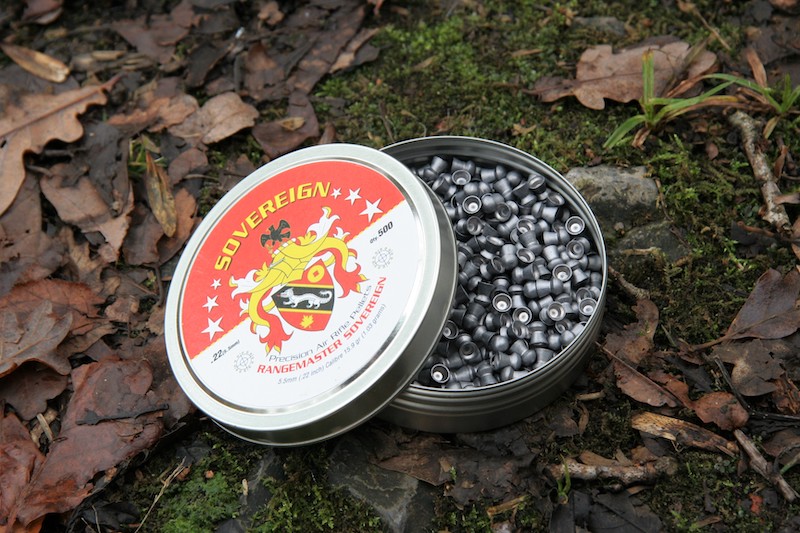
Mat has achieved great results by matching his Red Wolf with Rangemaster Sovereign pellets.

I watched the fidgety squirrel through my MTC Mamba Lite scope as it darted back and forth, picking small morsels up from the ground. It eventually sat up and hunched over to nibble at a larger grain. The momentary pause presented me with a side-on view of the static squirrel’s head. I settled the crosshairs onto the unsuspecting bushy-tail’s skull and rolled it over with a shot that echoed around the woods as the pellet hit home.

I’ve tried numerous pellets through my .22 Red Wolf, and have currently settled on Daystate Rangemaster Sovereigns. At its full power 35ft/lb, they don’t group quite as tightly as heavier pellets at extreme range but their accuracy is still impressive and they have a very flat trajectory. This power and pellet combination has proved itself countless times during woodland hunts, but being able to wind down to 16ft/lb also means that I’m able to use the same combo for other applications.

A grain-raiding squirrel arrives at the feeder and Mat lines up for the shot.

Back to the squirrel hunt, and I decided to leave the first addition to the day’s bag where it fell to avoid spooking others by breaking cover. It proved to be a good move when another squirrel started chattering from the treetops about 30 metres away and was promptly added to the bag.

My ambush was limited to just over an hour as I was only out on my pre-work rounds, and I had a long day in the office ahead of me. Nonetheless, I managed to add one more grain-raiding squirrel to make it a trio before heading home for breakfast. That’s three less squirrels causing trouble in that particular woodland, and proof indeed that it is certainly worth targeting this most destructive of pests during periods of cold weather.

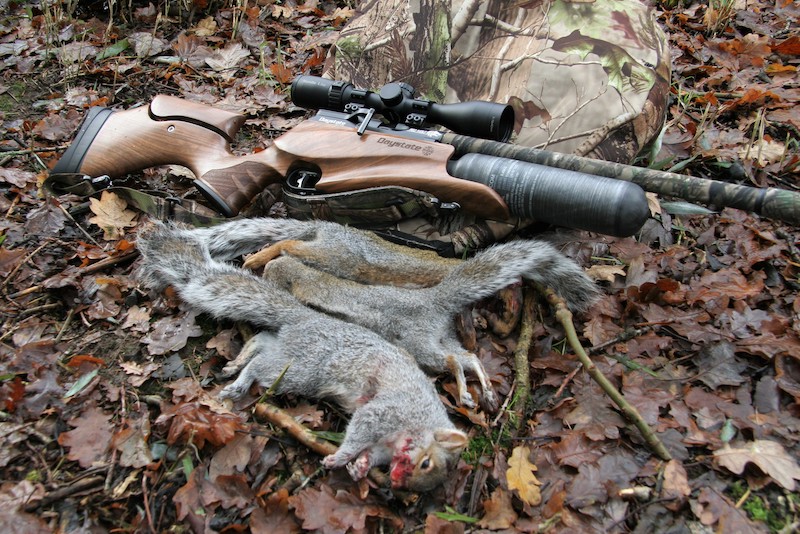
This trio of squirrels made the mistake of venturing out in the cold when Mat was lurking with his Red Wolf.
Mat Manning Prone

Modern pre-charged air rifles are capable of blistering accuracy and the electronic Daystate Red Wolf really does take precision to another level.

Match it with the right ammo and a bipod and this airgun is more than capable of landing pellet on pellet at 30 metres and beyond.

The Red Wolf’s sophisticated internals result in an extremely fast lock time, greatly reducing the lag between the shooter pressing the trigger and the pellet leaving the barrel. A faster lock time means there’s less chance of the tiny wobbles from your body affecting your aim, effectively making it easier to shoot accurately.

This enhanced potential for precision is easy to exploit when you’re shooting on a range but, even with all the benefits this gun brings, it’s not quite so simple in the field. The fact is that the shooter is almost always the weakest link in the accuracy chain. Whether standing, kneeling or sitting, it’s very difficult to completely overcome the tiny movements caused by the swaying of your body, your breathing and even your pulse.

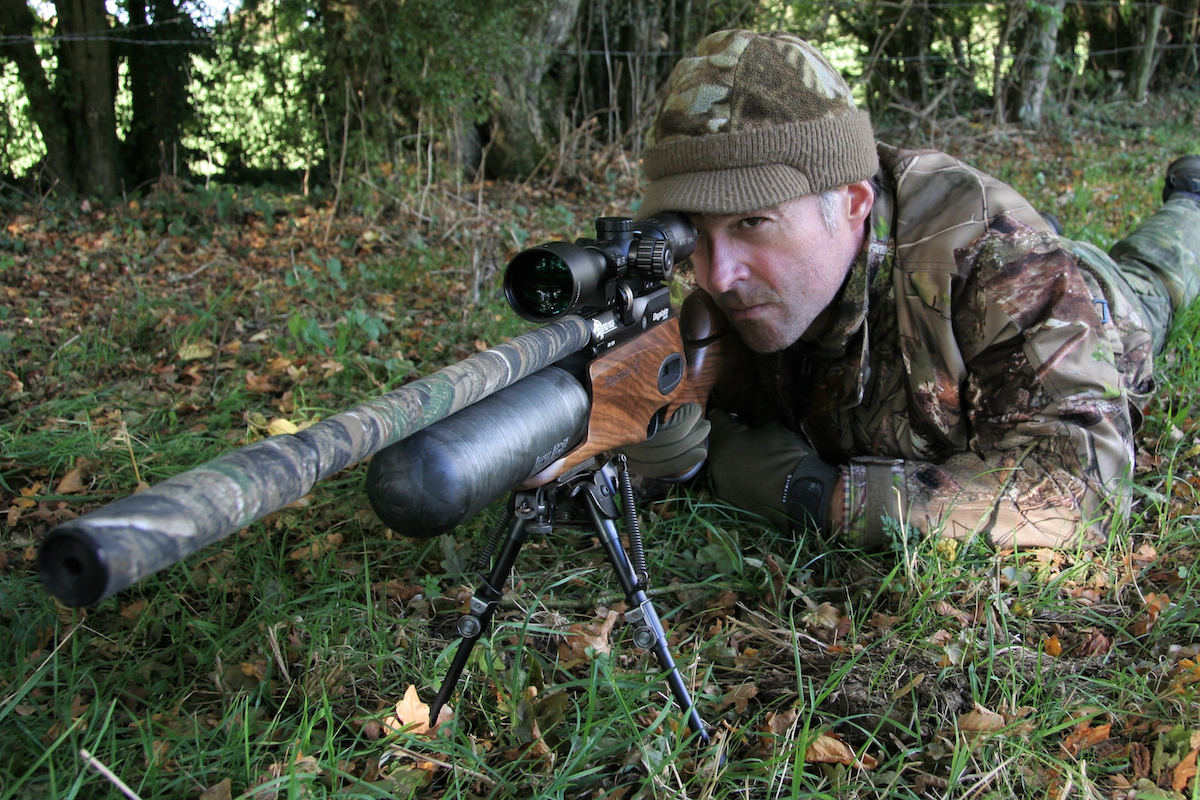
Shooting prone and utilising the support of a bipod is a great way to extract optimum accuracy from a precision air rifle.

To fully exploit the accuracy potential of my air rifles when I’m out hunting, I take full advantage of any opportunity to take leaning shots; using trees, gates and fences for added support whenever possible. To really get the most of a gun like the Red Wolf at long range, you can’t beat shooting from the prone position with the support of a bipod. Shooting prone gets your centre of gravity as low as you possibly can, making it virtually impossible for your body to sway, and the stability provided by the bipod makes it a lot easier to hold the crosshairs dead on target when using a scope at higher magnification.

Unlike the Daystate Pulsar, the Red Wolf doesn’t come with an integral accessory rail for bipod attachment. Fitting the stock with a quick-release stud is a simple job, though, and creates a secure fixing point for a bipod and also a sling.

Red Wolf Bipod
Fit the Red Wolf’s stock with a quick release stud and it’s easy to clip a bipod on and off.

With the rabbits on one of my permissions getting more and more wary as they grow older, long-range sniping from the support of a bipod is by far the best way to bring them to book. My favourite approach is to lay in wait and pick off unsuspecting bunnies as they emerge to feed at the end of the day.

You have to set up in the right place for these tactics to work. It’s important that rabbits venture out within range because all the stealthy advantages of setting up an ambush will be lost if you are forced to create noise and movement by trying to creep in closer for the shot.

Look for places that you know are frequented by rabbits. The obvious sites to target are those where you have actually spotted rabbits but there are other clues that can steer you in the right direction. Rabbit burrows are a clear sign of their presence – you want to find ones with clear openings and plenty of excavated soil to confirm recent activity. Droppings are another useful calling card to guide you to the right place – fresh ones are dark and moist. Other, subtler signs include runs through brambles and other undergrowth, and very close-cropped grass where rabbits have been feeding around field margins.

The added stability of a bipod makes it easier to keep the crosshairs steady when you wind up the magnification.

Once I’ve located a place where I expect to encounter rabbits, I try to set up within striking distance and with the wind blowing towards me. This ensures that any scent I am carrying from the human world is carried away from the rabbits rather than towards them.

If there are rabbits out when you arrive, try to resist the urge to stalk them. Instead, simply stroll across the field to your chosen position. Moving in this way, you will look more like a walker than a predator, and the rabbits are more likely to have the confidence to venture back out as a result.

You don’t need a hide or a blind for this sort of ambush because shooting from the prone position keeps you down off the skyline. I sometimes wear a camouflage head net for added concealment but it is not essential. The vital thing is to keep still and quiet.

Mat Manning Shooting
A rabbit creeps out from the undergrowth and Mat lines up for the shot.

This approach takes patience but you should be rewarded with relatively straightforward shots. More often than not, the rabbits won’t even know you’re there, and shooting from a fixed position means you can work out ranges to set markers such as trees, gates and fence posts as soon as you arrive so you can use them as reference points when chances come along.

Prone Shooting
The prone position helps with concealment by keeping your profile low.

One problem with shooting from the prone position is that shots can sometimes be hampered by low-lying cover, especially when rabbits have their heads down feeding. If I can’t get a clear shot at a rabbit that has its head down among the grass, I either make a squeaking sound through pursed lips or click my tongue against the roof of my mouth. The noise is usually enough to make rabbits sit bolt upright with ears pricked. In this position, they tend to offer a very clear target.

These tactics work best in relatively calm conditions, as a stiff breeze will make it difficult to judge where the pellet is going to strike at longer range. It’s also important to put in plenty of practice. Perfect your prone shooting on paper targets on the range, and you’ll know exactly which aim-points on your scope’s reticle you need to use over varying distances.

Airgun Accuracy
Match your airgun with the right pellet and put in the practice, and a bipod can really boost long-range accuracy.
mil bracketing

HOW TO RANGE-FIND WITH MIL BASED CROSSHAIRS

Airgunners may be missing this trick with their mil-dot scopes

Riflescopes that feature a mil-dot reticle are in vogue, with many scope manufacturers developing their own crosshair designs to incorporate ‘mil’ spacings (not always signified by dots). Airgunners favour mil-dot optics primarily because they tie in so well with a pellet’s trajectory, which follows a more pronounced flightpath than a high-powered bullet fired from a rifle. An airgun pellet is also more susceptible to wind drift. With so many aiming points to reference in the sight picture of a mil-dot scope, the airgun shooter can therefore easily make allowances for holdover, holdunder and windage when lining up the shot.

Yet using mil-dots solely for aiming purposes isn’t really taking full advantage of the concept behind the system. Indeed, it’s likely that most airgunners are missing a trick with such scopes.

mil dot reticule
Figure 1. Standard type mil-dot crosshair. The spacing between each dot is equivalent to one milliradian, or 1 mil

The mil-dot system was primarily developed for range-finding in military applications, where bracketing a target between the dots could provide a rough and ready estimation of its downrange distance. While there’s no denying their effectiveness as a multi-aimpoint crosshair for airgun use, the principles behind the system also make it an ideal tool for determining how far away your target is. So, for the airgun shooter, looking down a mil-dot scope offers the best of two worlds: plenty of aiming stadia and an integrated range-finding system!

WHAT IS A MIL?

Mil-dot reticles are so called because they revolve around a unit of angular measurement known as a milliradian, or ‘mil’ for short. One mil equates to 36 inches at 1,000 yards; more easily converted in metric as 10cm (100mm) at 100 metres. Being angular, the measurement value of a mil will change over distance, although its relationship is a linear constant. For example, one mil will equate to 20cm at 200m (double that of the 100m measurement), 5cm at 50m (half that of the 100m measurement) and so on.

For most airgun shooting scenarios, distances are commonly 50 metres and below, but the mil-dot system still translates well. The table in figure 2 shows the benefit of working in metric values; if you wanted to know the value of a mil at 25 metres, for example, it doesn’t need much brain power to work out that it would be 25mm!

Mil Chart
Figure 2. The measurement of a mil is dependent on distance, but it’s easy to remember!

Besides dots, mil measurements are often represented by short stadia incorporated into the crosshair’s design, giving the shooter a kind of ruler to measure by. As there are advantages to measuring in smaller increments, advanced reticles like MTC Optics’ SCB2 and AMD also offer the shooter measuring marks in half-mil steps. By halving the measurement reference of a mil, smart crosshairs like MTC’s provide an even more precise aiming and range-finding system.

BRACKETING

If you know the size of your target, you can quickly gauge its distance by simply ‘bracketing’ it between the mil (or half-mil) marks on your scope’s reticle and taking a note of how many of these it spans. Conveniently, you can undertake this as part of the aiming process, making it a speedy affair.

Take this scenario as an example (figure 3). You’re lining up on a bird pest, perched on a branch an unknown distance in front of you. The bird measures approximately 200mm from beak to branch. So, because it ‘brackets’ between a five-mil spacing on your MTC scope’s SCB2 graduated crosshair, you can confidently estimate its range to be 40 metres. How? Through a dead easy formula: target size divided by mil spacings. In other words: 200mm divided by 5 mils… equals 40m.

mil bracketing
Figure 3: Using the bracketing system in conjunction with the SCB2 crosshair on this MTC Optics scope indicates the crow’s range is (200 ÷ 5 =) 40 metres. The hunter can then take aim using the appropriate aiming mark on the reticle

Take another example – a feeding rabbit. You approximate the top of its body to be 150mm off the grass and can bracket it between three mil spacings. So, 150 ÷ 3 = 50; the rabbit is around 50 metres away. Handily, you can then select the aiming dot or stadia relevant to that distance on your scope’s crosshair to allow for holdover. Easy!

The half-mil system comes into its own for much smaller targets, such as the ‘kill area’ of a knock-down silhouette, where bracketing measurements need to be far more precise. As such, half-mil reticles are favoured by outdoor competition shooters, though the range-finding calculation is the same.

Suppose you are aiming at a metal silhouette with a 12mm diameter ‘kill’ disc. If you can bracket the disc between a single half-mil spacing, then the distance of the target from you must therefore be 12 ÷ 0.5 = 24 metres. Likewise, if you can bracket it between three half-mil spacings (i.e. 1.5 mils), then its range must be 12 ÷ 1.5 = 8 metres (figure 4).

mil bracketing
Figure 4: The more precise half-mil markings of MTC’s SCB2 crosshair are useful for smaller targets. The 12mm diameter inner ‘kill’ of this knock-down may look tricky, but at least you know the target’s exact range – 12 ÷ 1.5 = 8 metres!

Given how easy the milliradian formula is, making a spur of the moment range calculation is quick as well as accurate. However, why not print off the table in figure 5 to keep in the pocket of your shooting jacket for an always-at-hand reminder?

table
Figure 5: Assess the size of your target to then easily estimate its range based on the number of mil spacings it can be bracketed by. The quick calculation is: distance (mtrs) = target size (mm) divided by number of mils

BRACKETING WITH ZOOM SCOPES

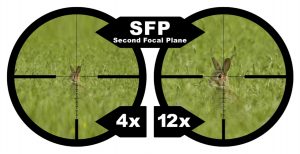
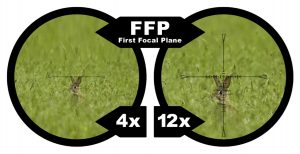
As simple as the mil bracketing system is to range-find with, there is something to be aware of if you have a variable power scope: the focal plane where the scope’s reticle is located. Scopes fall into two types, those where the reticle is in the first focal plane (FFP) and those where it is in the second focal plane (SFP) – see here.

With a FFP scope, both the target size and reticle remain in proportion to each other, regardless of the magnification you set. Therefore, you can use the bracketing system to range-find your target on any magnification with these scope types.

However, with a SFP scope, you can only accurately use the bracketing system on one magnification setting: the ‘true’ power. Though this is often 10x magnification, it can vary between scope manufacturers and models, so it’s an important number to know on your own telly. If, for example, your scope’s mil-dot crosshair is ‘true at 10x’, but you always shoot on 12x power, you will have to wind down the magnification to 10x when range-finding using the bracketing method.

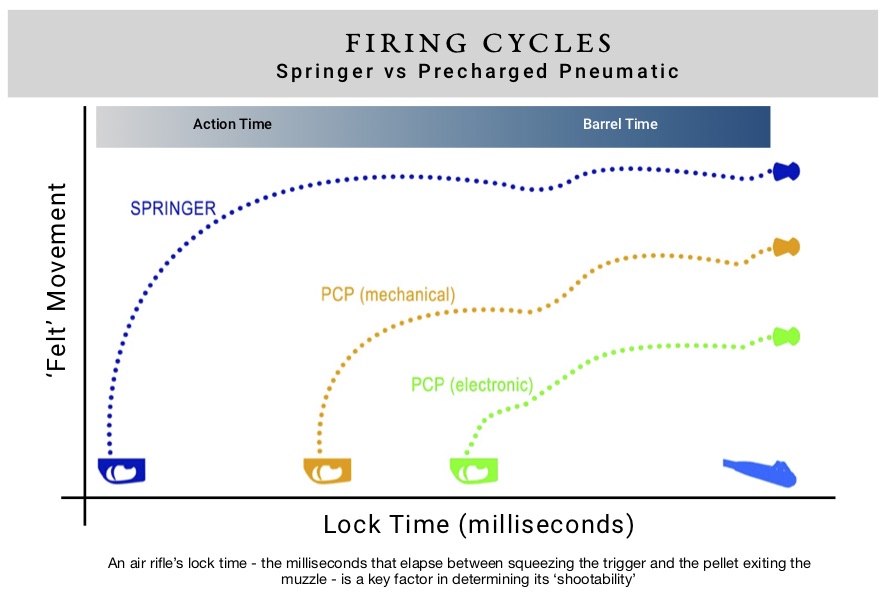
Lock Time Graph

The reason one air rifle is easier to shoot than another is the speed of its action.

An airgun’s firing cycle – the brief moment that elapses between the trigger’s sear being slipped and the pellet exiting the barrel – is more commonly called its lock time. It’s quick, typically lasting 15 milliseconds or less. Yet it is a vital characteristic of any airgun. In fact, lock time is a key reason why some guns are easier or ‘more forgiving’ to shoot than others.

In theory, the faster the lock time, the more accurate the rifle, though lock time is actually the sum of two other ‘times’ that, individually, contribute to an airgun’s overall firing cycle. These are the action time and the barrel time.

Barrel Time

On most airguns, the shortest element of lock time is barrel time, which obviously takes place at the latter end of the firing cycle. It refers to the time taken for the pellet to travel up the bore of the barrel, before exiting the muzzle. Relatively, there’s minimal difference in the overall lock time between a high-velocity pellet travelling up a short barrel and a low-velocity pellet travelling up a long barrel. In other words, barrel time isn’t the most influential element of an airgun’s lock time.

Action Time

What has the biggest effect on lock time is the action time. This refers to the beginning of the firing cycle, the instant the trigger breaks. Here, there can be huge differences according to the gun’s configuration. Spring-powered airguns (springers) have a longer action time than precharged pneumatics (PCPs). And the feel of PCP actions can vary hugely by design, with electronically-controlled PCPs offering the fastest action time of all.

In a springer, the action time commences with the piston travelling forward under pressure from the uncoiling mainspring. It continues with the piston ‘bouncing’ on a slug of high pressure air before finally ending when the piston comes to a crashing halt at the end of the compression cylinder. A springer’s action time will invariably run into its barrel time, because the pellet will have started its journey up the barrel before the piston finally bottoms out. However, the action time should, on a properly set-up springer, have ended before the pellet exits the muzzle.

In a mechanically-driven PCP, the action time begins with the hammer being driven forward under spring pressure. It continues while the hammer strikes and opens the valve, and effectively ends at the time the valve closes. This will pretty much be at the same instant the pellet starts to accelerate up the barrel. Of course, with a much smaller hammer and spring, not to mention stroke, the PCP’s action time is significantly shorter than that of a springer’s. It’s also the reason why a PCP’s firing cycle is, for all intents and purposes, recoil-free.

However, the action time can be even shorter on the ground-breaking electronic PCPs Daystate pioneered back in 2003. Their current flagship duo, the Pulsar and Red Wolf, use a solenoid in lieu of a hammer to open the valve so rapidly that, ironically, it’s the barrel time that becomes the most influential element of the gun’s lock time!

Red Wolf Serie Rosso- an electronically-driven PCP that boasts the fastest lock time of any air rifle

Red Wolf

LOCK TIME – THE KEY

So, given lock time lasts only milliseconds or less, why does it have such an effect on an airgun’s ‘shootability’? Well, time really is of the essence because the longer it takes to get the pellet out of the barrel, the more chance the rifle has of moving off the mark you intended at the instant you touched off the trigger.

In a springer’s case, the shooter is not just fighting with recoil as the rifle shunts back-and-forth in reaction to the heavy piston’s movement. Time is also ticking away before the pellet begins its flight to the target. When you analyse the timeframe of a springer’s firing cycle, it’s a wonder anyone can achieve consistent accuracy! (This is why it’s often said that if you can shoot a springer well, you can shoot a rifle of any type.)

In a PCP’s case, there is little ‘felt’ recoil to trouble the shooter’s aim. However, there is still movement going on during the firing cycle, even if it’s minimal by comparison with a springer. Newton’s laws of motion will dictate that the rifle will be moving in your shoulder to counteract the momentum of the hammer’s travel and impact with the valve during its action time stage. So, the longer this takes, the more likely the rifle’s aimpoint will err between the trigger-break and pellet-exit points.

In addition, mechanically-driven PCPs can also have an action time that varies according to its charge state. In the simplest knock-open valve designs, there is a slower action time the further into the air charge you go, and also a noticeable change in the movement of the rifle as its cylinder’s air pressure drops behind the firing valve. This makes it physically harder for the shooter to achieve consistent results.

This isn’t such a problem with the more sophisticated PCP designs, like the Slingshot hammer and valve system used on some mechanically-driven Brocock and Daystate PCPs. But the fact remains, where all other things are equal, a PCP with an action time of seven milliseconds will be easier to shoot accurately than one with an action time of 11 milliseconds. Even if four thousandths of one second doesn’t sound enough to affect the shot, the truth is: it does!

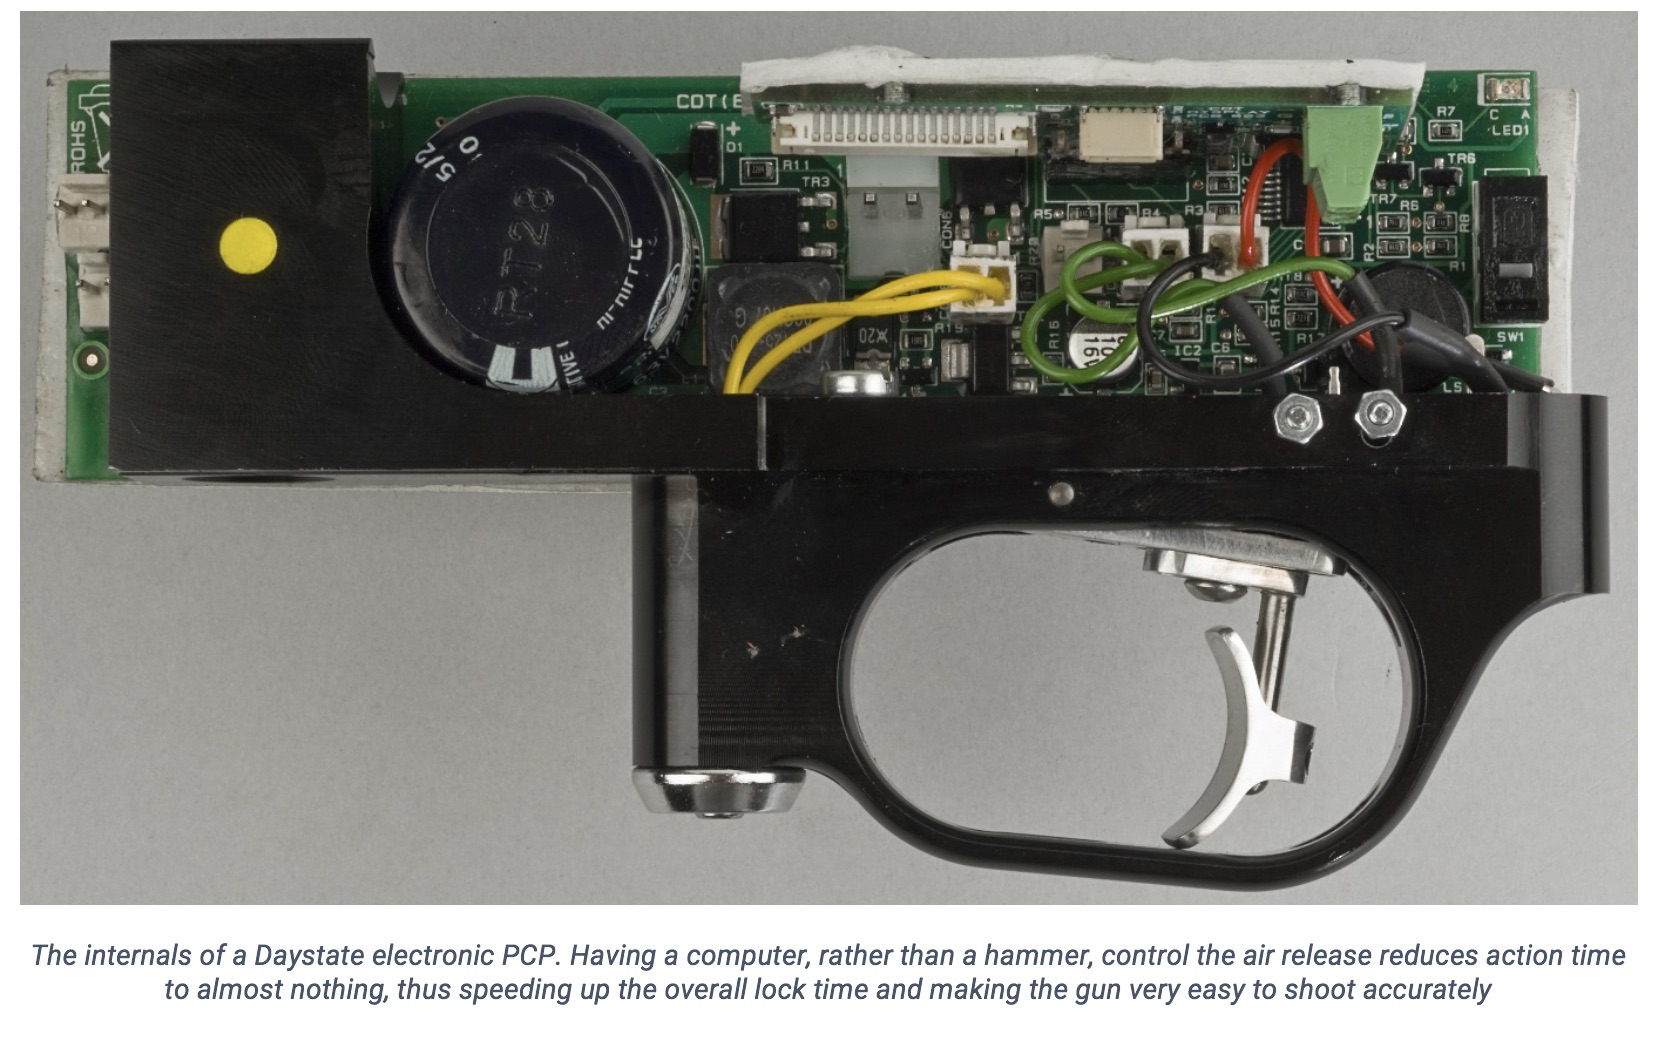
Electronic Trigger Unit

Which is why Daystate’s electronically-controlled PCPs are so easy to shoot accurately. Their action time – and so the rifle’s overall lock time – is reduced by such a considerable amount that it’s not uncommon to ‘call’ a miss… only to find you’ve landed the shot plumb centre at the target!

By comparison with mechanically-driven PCPs, the digital action of an electronic PCP reduces action time by roughly 90 per cent, effectively making barrel time the only element of its firing cycle. Typically, the overall lock time is reduced to around just five milliseconds; so fast, in fact, that the rifle can feel quite ‘dead’ on firing.

With computerised control of the valve and air delivery in the shape of MCT (Mapped Compensated Technology) also integral to Daystate’s high-tech PCPs, shot release is as consistent as it is quick. This is why rifles like the Pulsar and Red Wolf are so easy to shoot well with – their lock time simply doesn’t give the shooter long enough to flinch a shot off target!

Regulated PCP or unregged? That is the question!

What is the difference between a regulated PCP and an unregged one?

by Nigel Allen

Precharged pneumatic (PCP) air rifles are powered by compressed air contained in either an integral air cylinder or buddy-bottle. Although the PCP is the serious airgun shooter’s choice, its concept is inherently simple. A hammer strikes a valve which releases some air to thrust the pellet out of the barrel. The hammer always strikes with the same force. So the amount of air released by the opening valve changes as the rifle’s on-board air pressure behind it drops. This affects the velocity (power) output of the rifle as it progresses through its air charge. This results in what’s known as a ‘power curve’.

The Power Curve

The specific shape of the power curve varies according to the rifle’s design. Generally, an unregulated PCP’s power output will rise to a peak before dropping off to the point it needs recharging. A power output that’s dependent on the air rifle’s pressure is not ideal because the pellet’s downrange point of impact (POI) will alter accordingly. Because of this, many airgunmakers incorporate an air regulator into their guns. In a regulated PCP, the power output stays consistent throughout its entire air charge.
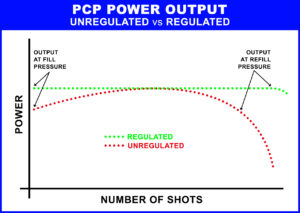
Comparison of typical power outputs from a regulated and non-regulated precharged pneumatic air rifle

So, which to choose? Although a regulated PCP may seem the ideal, unregged PCPs have been around for many years and are still popular. Indeed, much R&D has been undertaken in the PCP world, so the simple ‘knock-open’ valve of old is a far cry from what we see on today’s airgun hardware. The Slingshot hammer/valve set-up used in the unregulated Daystate PCPs is one such example of how far unregged PCP design has evolved. Nevertheless, characteristics of unregged and regged systems are an important consideration when choosing a PCP for your specific shooting needs.

UNREGULATED PCP

Between the first and last shots of an unregged PCP’s charge of air – its ‘usable’ range – the output will follow a power curve, peaking somewhere around the mid-point of the curve. While the duration of the peak depends solely on the rifle’s inherent design, this part of the curve is referred to as the ‘sweet spot’. It’s where the shot-to-shot consistency – and so the rifle’s accuracy – will be at its best. The longer the sweet spot, the better. Ideally, that is where you want to be doing most of your shooting (and where you should zero your scope).

Sweet Spot

Of course, you can shoot either side of the sweet spot, but you may well see a slight change in the pellets’ POI. At relatively close ranges this probably isn’t a problem, but it may shift your pellets outside acceptable limits for hunting or competitive target shooting at longer distances. Therefore, with any unregulated PCP, it pays to familiarise yourself with the characteristics of its power curve so that you can compensate for POI shift if required.
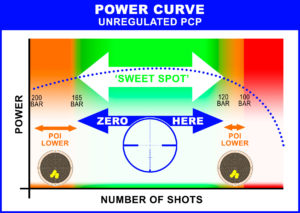
An unregged PCP lets you shoot throughout its usable pressure range (200 down to 100 BAR in this example). However, the best consistency, power and accuracy is in its ‘sweet spot’ (165 down to 120 BAR)

Best Fill Pressure

For example, your rifle may fill to 200 BAR and then, 150 shots later, need a refill at 100 BAR. Let’s assume its sweet spot spans 65 of those 150 shots. Then it would be worth noting on the rifle’s manometer what pressure range relates to that 65-shot section – perhaps between 165 and 120 BAR. If the number of shots you get per charge of air doesn’t bother you, you could choose to fill the rifle only to 165 BAR each time, and always refill it at 120 BAR. Yes, the trade-off is that you’d be reducing the rifle’s shot-count, but in return you’d be getting an output performance on a par with a regged PCP. Plus, by starting at lower pressures, charging the rifle from a manual pump will be less effort, and you’ll get longer periods between scuba tank fill-ups.

REGULATED PCP

Where an air regulator is fitted to a PCP, air release is far more controlled for the entirety of the rifle’s charge and there is therefore no power curve. Effectively, a regulateded PCP offers a sweet spot that extends from the first to the last shots of the usable shot range. In some cases, because a regulator deals with air delivery more efficiently, the rifle also returns more shots between fill-ups.

Generally, a regulator system incorporates a secondary air chamber (the plenum chamber) which is designed to operate at a constant pressure. This means that as the rifle’s air pressure drops, the main firing valve always delivers an exactly-metered volume/pressure of air. The benefit of this is that the rifle’s power output is the same, no matter where it is within its charge cycle.

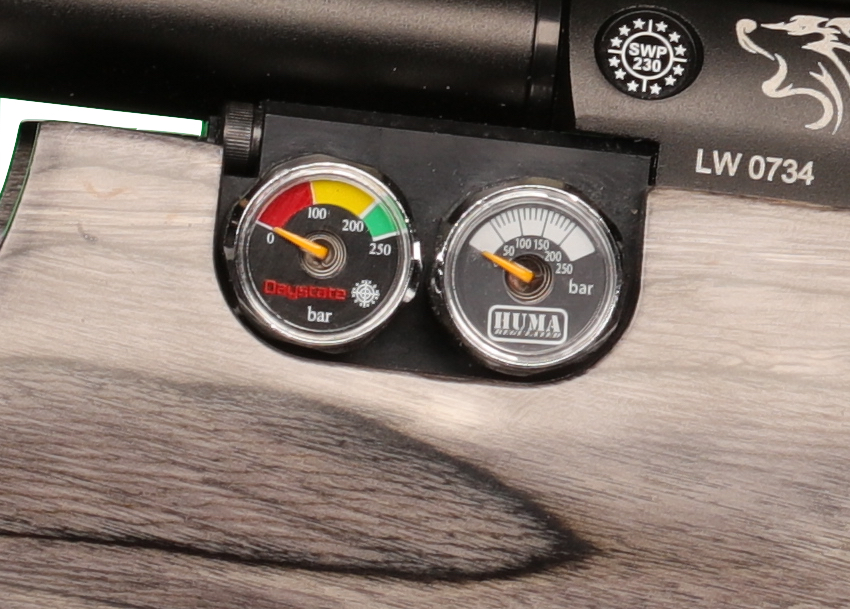
That said, it is important not to let the pressure in the rifle’s main air reservoir drop below that of the regulator’s operating pressure, else the regulator effectively becomes redundant in the air flow chain. Many gunmakers now incorporate an additional gauge on their regged PCPs to specifically indicate the regulator status, like on the Brocock Commander PCP.
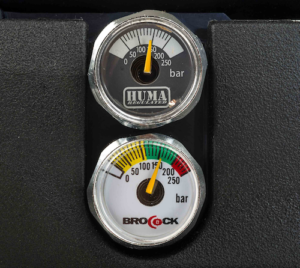
The regulated Brocock Commander has two manometers – one for its HUMA regulator’s fixed pressure (top) and one to show the pressure status of the rifle’s main air reservoir

Air Management

While ‘managing’ the power curve of an unregged PCP isn’t exactly a headache for most shooters, there’s no denying that the fill-and-forget operation of a regulated PCP is more straightforward. However, regulated PCPs cost more than their unregged counterparts, so you have to weigh up their worth in your particular scenario.

FT, HFT and benchrest competition shooters, who seek ultimate precision in every aspect of their sport, may be able to justify the outlay for a regged PCP, but for everyday shooting/hunting assignments, a good quality, unregged PCP is equally as good if you have a full understanding of its power curve.

Reliability

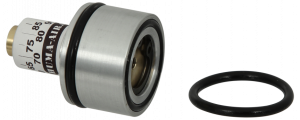
Yet never dismiss the addition of a PCP regulator as ‘just another thing to go wrong’. That may have been the case when airgunsmiths were experimenting with them many decades ago. But just like knock-open systems have evolved, the PCP regulator has also graduated. Specialist regulator manufacturers have risen to the forefront of the airgun industry, with many gunmakers incorporating their proven designs in their regulated PCP. Daystate, for instance, have partnered with the world renowned HUMA to develop a metering system in the new regulated HR Huntsman Regal, Renegade HR and Wolverine R air rifles.
[/vc_column_text][/vc_column][/vc_row]
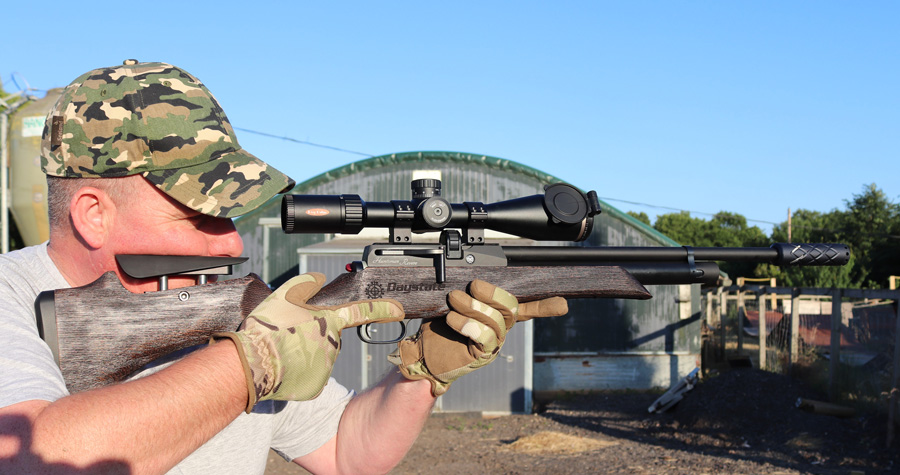
How a First Focal Plane Riflescope differs from a Second Focal Plane one

Riflescopes – First and Second Focal Plane and How They Differ

Nigel Allen’s take on First and Second Focal Plane Riflescopes

When it comes to selecting a riflescope, shooters have a bewildering choice. Should you choose fixed or variable magnification, sidewheel or objective parallax adjustment? Do you need a 25mm or 30mm tube… And, also, what do all the numbers mean? Additionally, reticle design is also an important consideration when deciding on a riflescope. However, less obvious is the focal plane of the scope. What’s that? Well, it’s where the crosshair sits within the optical layout of the riflescope.

  • FFP or SFP

The crosshair of a riflescope can either be situated in the first focal plane or second focal plane (FFP or SFP). Because each offers significant differences on variable magnification (or zoom) scopes, it’s important to determine which type is best suited to your style of shooting.

The majority of riflescope designs feature a second focal plane reticle as they’re easier to produce and keep costs down. However, most quality scope manufacturers now offer FFP scopes in their range. For example: MTC Optics’ new Cobra F1 model.

Both SFP and FFP scopes have their merits. To help you make an educated decision when choosing your next optic, here’s a guide on each type.

  • Second Focal Plane (SFP)

Sometimes referred to as ‘rear focal plane’, SFP scopes are by far the most common type. Their construction is such that the crosshair is placed behind the lens group that determines the scope’s magnification.

In the case of variable magnification scopes (eg: 2-12x or 4-16x), this second focal plane position means that the size of the reticle does not change as the magnification is altered. Only the target appears bigger or smaller as the scope is zoomed in and out. On multi-stadia crosshairs, this means the relationship between the aim-point references on the reticle and the target will be different depending on the magnification setting.

For example, the distance between two aim-points on the crosshair may equate to 4ins (10cm) on a target when it’s viewed at 4x magnification. But it will only be 1in (2.5cm) when the scope is zoomed up to 12x magnification.

With SFP scopes, the relationship between the target and crosshair will change when the magnification is altered. Reticle shown: MTC AMD

  • Multi-Stadia and SFP

Of course, the centre point of the crosshair should not, in theory, deviate when the magnification ring is rotated. Note: it often does on the cheaper scope models! However, if you use multi-stadia crosshairs like the MTC SCB2 to allow for ‘holdover’ or ‘holdunder’, then you must be aware of this target/crosshair relationship change. It’s therefore best practice to familiarise yourself with the aim-point/trajectory relationship by only shooting on a specific magnification. For example, stick on a 4-12x zoom scope, you could stick to shooting on 8x power.

This begs the question: “Why choose a SFP vari-mag scope, then?” Well, a zoom magnification feature is still a very handy feature to have. Use it for spotting purposes, where higher powers allow you to see a clearer sight picture. And many shooters also like to use SFP reticles for ‘bracketing’. This is a system where ranges can be estimated after having predetermined what distance the gaps between reference points equate to at each of the scope’s magnification settings. Although it requires some initial working out, reticles like MTC’s SCB2 and AMD can provide a very practical method of quickly estimating (or checking) range while taking aim.

  • First Focal Plane (FFP)

Sometimes referred to as ‘front focal plane’, FFP scopes are usually more expensive by virtue of their more complicated construction. The crosshair is placed in front of the lens group that determines the scope’s magnification.

In the case of variable magnification scopes (eg: 2-12x or 4-16x), this first focal plane position means that the size of the reticle will appear bigger or smaller, in line with the target image, as the scope’s magnification is zoomed in or out. Therefore, with graduated crosshairs, the relationship between the aim-point references on the reticle and the target will always remain the same, regardless of the magnification setting.

For example, the distance between two aim-points on the crosshair may equate to 4ins (10cm) on a target when it’s viewed at 4x magnification. But it will still be 4ins (10cm) when the scope is zoomed up to 12x magnification.

With FFP scopes, the crosshair always maintains its relationship with the target when the magnification is altered. Reticle shown: MTC SCB2

  • Multi-Stadia and FFP

This makes life simpler if you use multi-stadia crosshairs like the MTC SCB2 to allow for ‘holdover’ or ‘holdunder’. Why? Because you can shoot on any magnification setting without worrying about a change in the aim-point/trajectory relationship.

There are a couple of points to remember with FFP scopes. Because the reticle size alters with the magnification, the crosshairs’will look different. They will appear thicker at the higher powers and thinner at lower powers. Also, you cannot really use the ‘bracketing’ system for range-estimation. However, as bracketing data is quite long-winded to initially set-up, many shooters prefer other ways to acquire the target’s distance. They might use a laser rangefinder, like the MTC Rapier Ballistic. Or, on higher-powered scopes, the scope’s onboard parallax adjustment facility.

We hope this helped, but ultimately the choice is up to you.

If a new scope is what you’re after, why not check out our sister company, MTC Optics’ online store ? Or why not come and see us at the various shooting shows. You’ll be able to test all the latest scopes from MTC optics as well as our rifles.