THE HUNTSMAN HH & MK2
Assembly Guide


INTRODUCTION
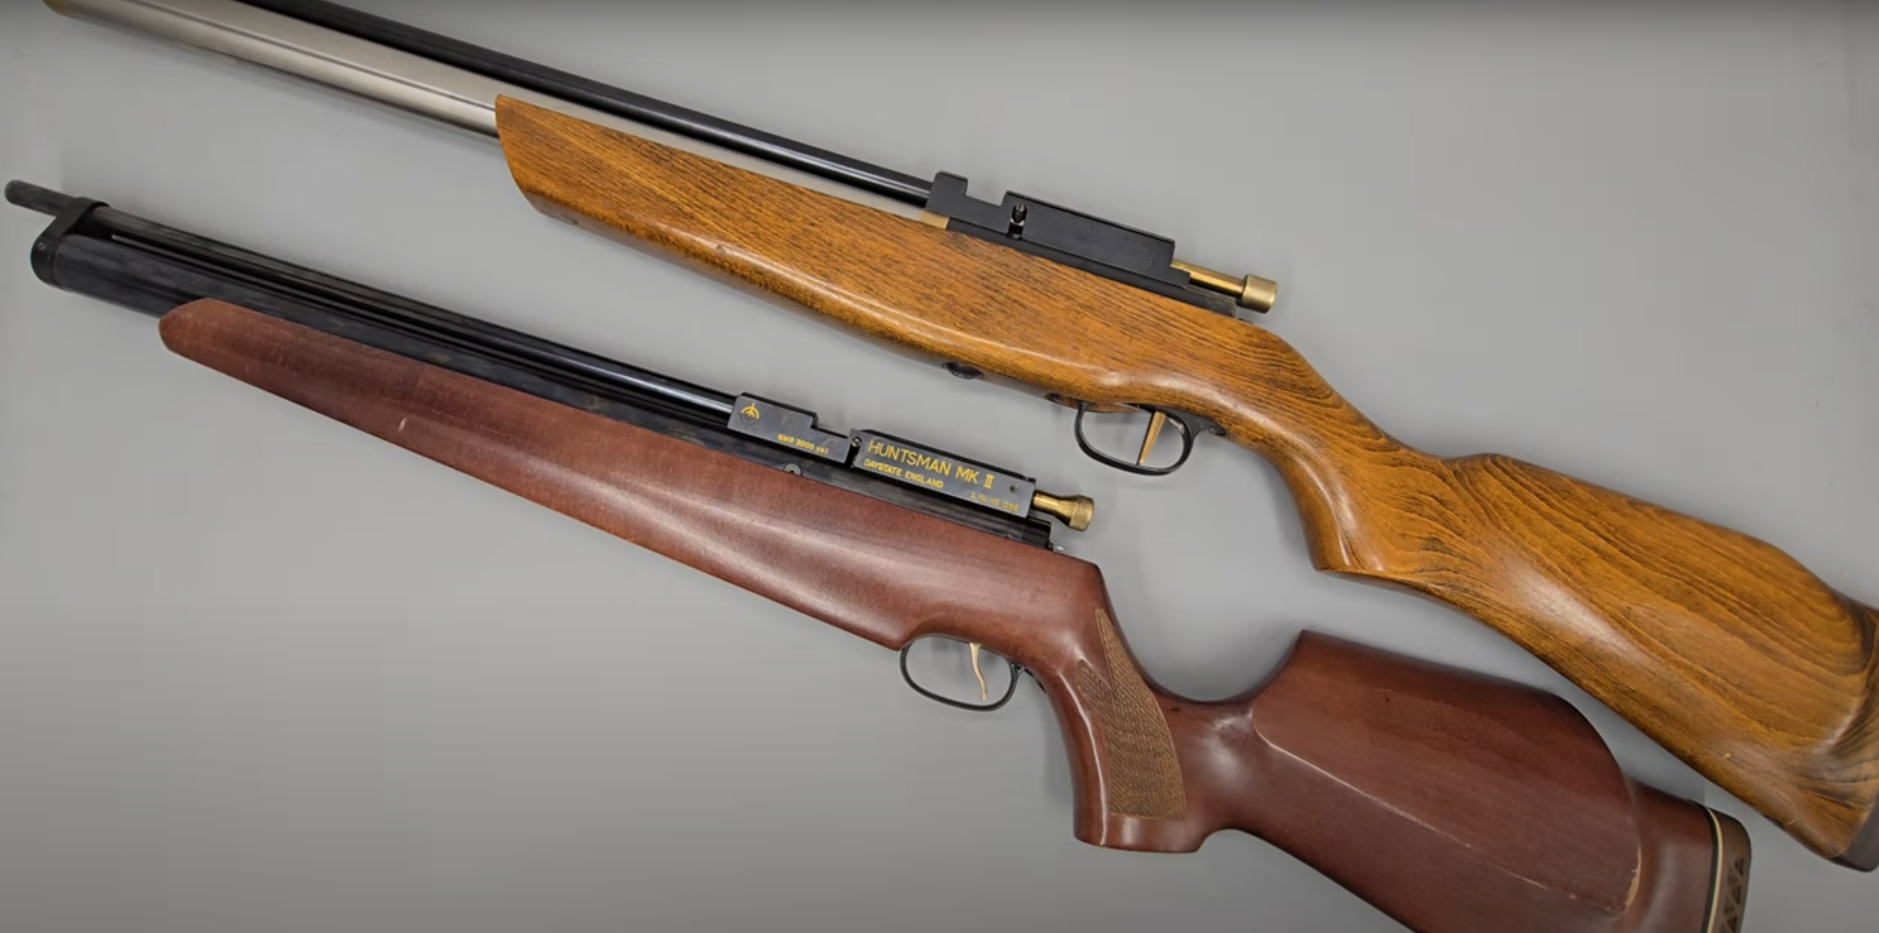
Daystate air rifles are engineered to the highest standards, but like anything else, they require repairs and servicing work to be carried out both in and out of warranty.
The aim of this guide and the accompanying video is to help you undertake work on the Daystate Huntsman HH and Huntsman Mk II to address common faults.
Compressed air is dangerous. You should only use this guide if you are a qualified and experienced gunsmith used to working with compressed air. Before you carry out any work any PCP air rifle, you must ensure it is not cocked, not loaded and empty of air. Degassing is achieved by dry firing them until the air supply is expended.
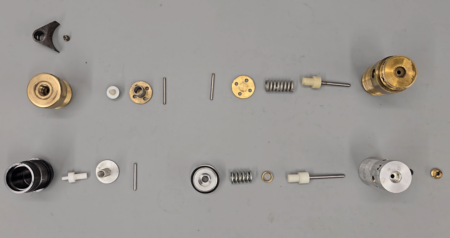
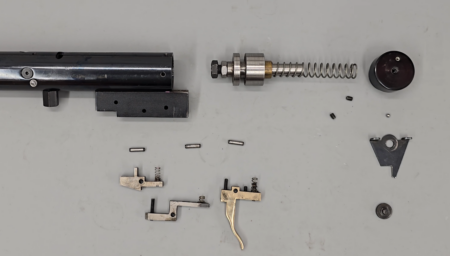
Valve components HH top Mk2 bottom
TOOLS YOU WILL NEED
- Allen keys: 1/16, 3/32, 3/16
- Spanners: 3/8, 1/2, adjustable
- Flat bladed screwdrivers: 3, 4, 6mm
FILL AND FIRING VALVE ASSEMBLY
01:00 Huntsman HH.
01:03 Install the firing pin into the valve by dropping it into the open end.
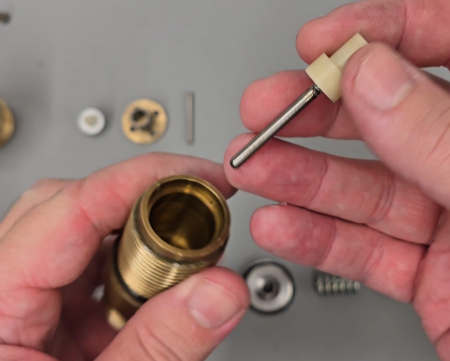
Replacing the firing valve modern replacement valves -shown- are brown in colour originals have a brass cover
01:12 Apply a light coat of synthetic grease to the spring and drop the spring on top of the valve.
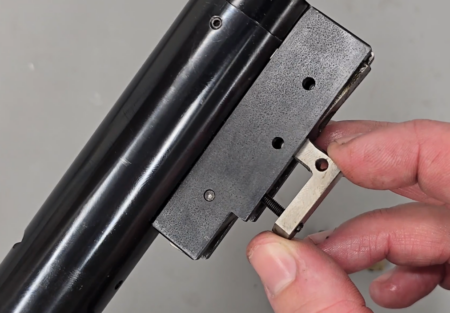
01:28 Place the valve cap on top of the valve and secure with the securing pin (01:33). Top do this, depress the cap (01:36) and insert the pin through the two holes on the sides.
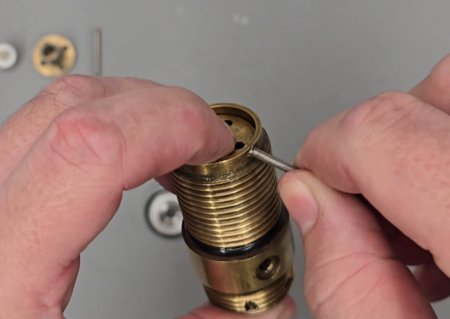
A cross pin secures the valve assembly
02:00 Insert the one-way PTFE valve and drop it into the open, threaded end of the fill valve housing. You may find using a pair of tweezers helps you align the stem of the valve with the hole.
02:22 Add a small amount of synthetic grease to the spring on the end cap.
02:31 Place the end cap over the valve, depress the spring and secure with the pin.
02:40 Attach the barrel band by aligning the larger of the two holes on the barrel band with the hole in the fill valve housing and secure with the screw using a 3/32 allen key.
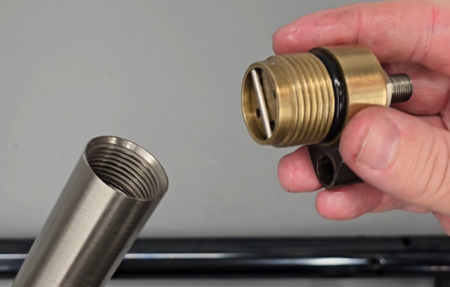
03:01 Attach the original ¼ to ½ BSP adaptor shown or a foster fitting to the end of the fill valve, tightening with an adjustable spanner.
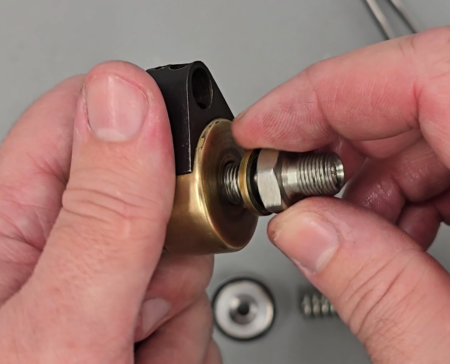
Many rifles are fitted wit an adaptor
03:24 Huntsman mk2.
03:24 Insert the one-way PTFE valve into the fill valve housing. Again, you might find using a pair of tweezers helpful.
03:32 Apply a small coating of synthetic grease to the spring on the cap and spring and insert into the housing. Depress with your finger and secure the cap using the pin.
03:57 Take the main body of the firing valve and add the valve stem ‘o’ ring to the hole at the top of the body and push it into place.
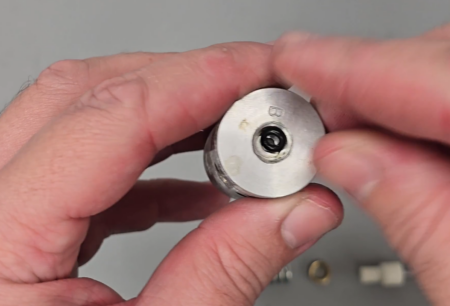
Valve ‘o’ ring replacement
04:08 Secure with the retaining screw and tighten with a flat bladed screwdriver.
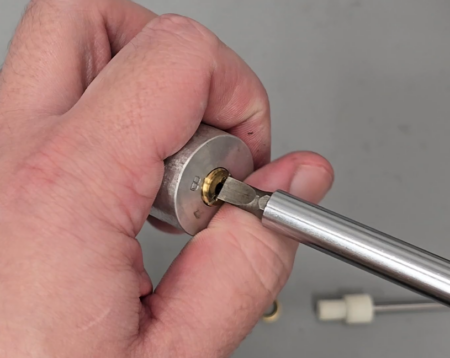
Valve ‘o’ ring retainer
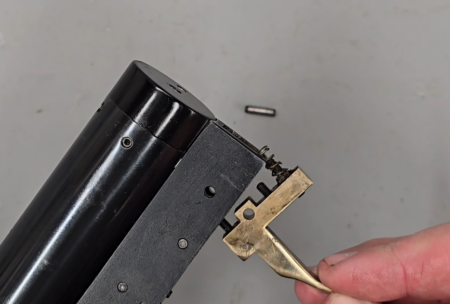
04:17 Turn the valve housing over and install the firing valve, dropping it into the hole.
04:24 Apply the valve spring spacer over the end of the valve and drop the valve return spring on top having first applied a light coat of synthetic grease.
MK2 have a brass spacer
04:38 Screw on the end cap, making sure the ‘o’ ring is not pinched. You may find it easier to roll the ‘o’ ring onto the main valve body whilst tightening and then returning it to the recessed groove.
04:55 Ensure the end cap is tightening to the extent that the entire assembled valve is the same length as the measurement you took when disassembling.
REASSEMBLING FILL CYLINDERS
05:23 Huntsman HH.
05:25 Apply a small amount on synthetic grease to the thread inside the cylinder.
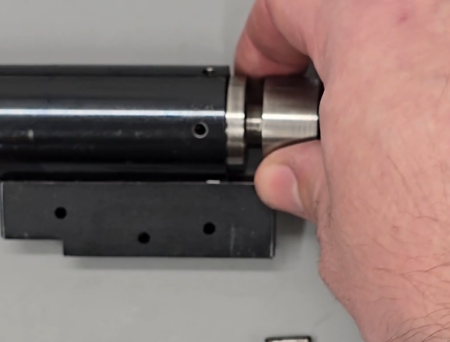
05:45 Apply a small amount of silicon grease to the ‘o’ ring on the firing valve and then into the cylinder and screw in. (05:55) Insert a lunch or similar into the hole to fully tighten.
Replacing the valve assembly not it needs to go back in the original end of the air tube
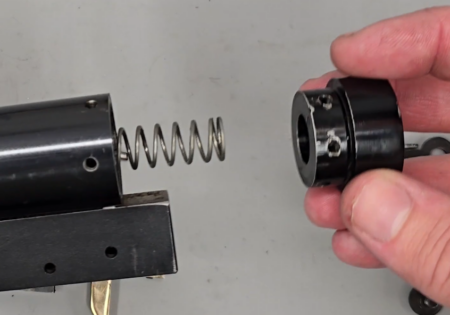
06:02 Apply a small amount of silicon to the ‘o’ ring on the fill valve and screw and the thread on the other end of the cylinder. (06:16) Install the fill valve and screw home by hand.
Replacing the inlet valve assembly
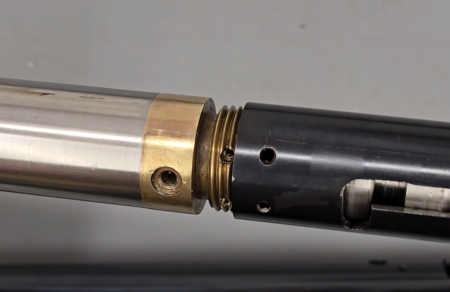
06:21 Ensure the transfer port is aligned with the top of the barrel band.
06:40 Huntsman mk 2.
06:48 Apply a generous amount of silicon grease to the ‘o’ ring on the firing valve assembly.
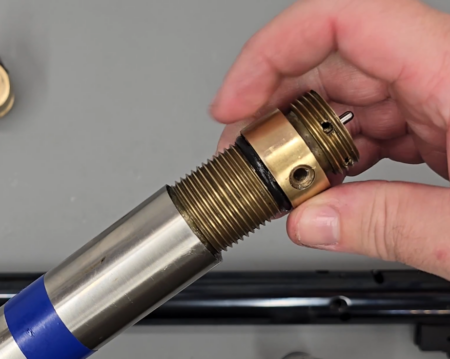
06:56 Push the firing valve assembly through the back of the cylinder ensuring the transfer port hole is aligned with the largest hole in the cylinder. Take care to ensure the ‘o’ ring is not damaged as you push the valve assembly home.
Replacing the main valve in the MK2
07:35 Screw in the end cap. (07:42) Insert two 4mm pins into the holes in the end cap and then using a punch or similar to fully tighten. Remove the pins.
Valve cap on the MK2
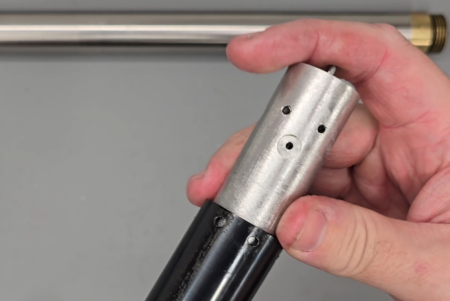
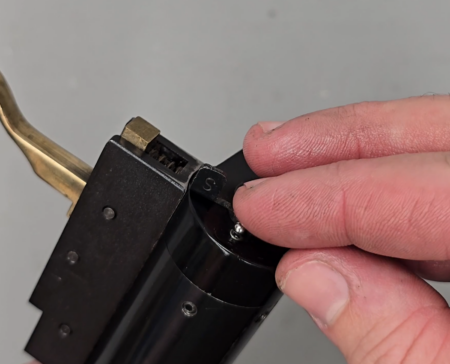
07:56 Insert the large securing pin into the hole forward-most on the bottom of the cylinder and tap into position.
08:12 Insert the two securing screws and tighten using a 3/32 allen key.
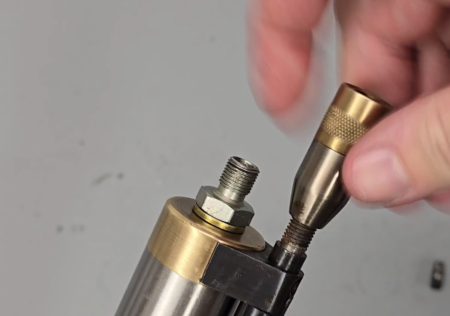
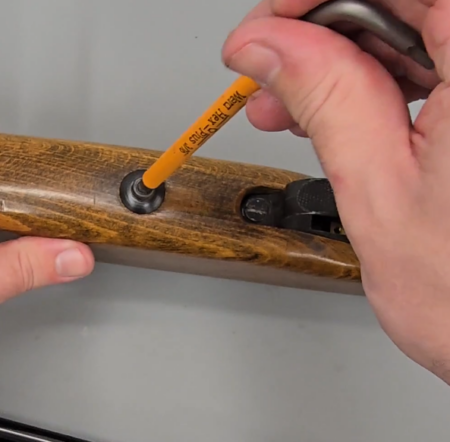
08:25 Insert the stud screw into the hole on the underside of the cylinder and secure with a flat bladed screwdriver. Note, the screw will be proud of the cylinder once tightened.
08:49 Screw the stock bolt fixing onto the exposed thread on the stud screw and tighten with an adjustable spanner.
This stud affixes the stock
REINSTALLING THE TRIGGER, HAMMER, HAMMER SPRING AND SAFETY ASSEMBLY
08:59 Huntsman mk2.
Hammer and trigger assembly of the MK2
09:11 Slide the hammer into the back of the tube.
MK2 hammer
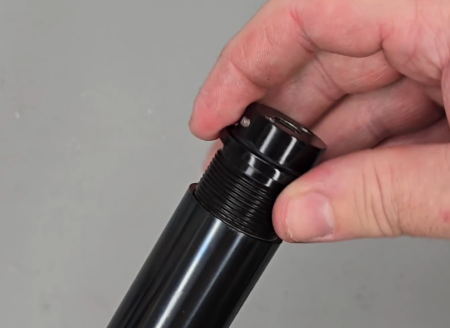
09:17 Take the safety cap and push onto the rear of the rifle against the exposed spring. (09:24) Ensure the two holes are aligned with the top of the rifle and the two grub screw dimples are aligned with the side of the rifle.
09:42 Insert the two grub screws and tighten with a 1/16 allen key.
MK2 endcaps are brass on the earliest rifles and alloy on later rifles
10:10 Note the trigger assembly is identical for both the Huntsman mk2 and Huntsman HH.
10:12 Add a small amount on lithium grease to the sides of the sears.
10:23 Install first the sear ensuing the hole at the front of the sear aligns with the forwardmost of three holes in the side of the trigger block. (10:35) Secure with a pin.
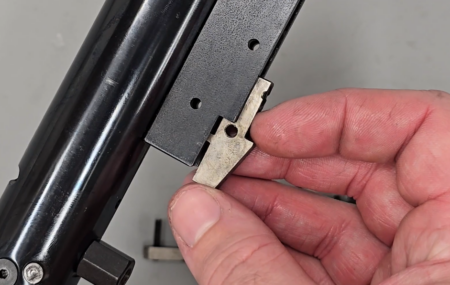
Location of the short sear
10:49 Apply a small amount of lithium grease to the sides of the second sear and insert into the bottom of the trigger block ensuring the hole in the sear is aligned with the middle hole in the trigger block. (11:07) Secure with a pin.
Long sear replacement
11:26 Apply a small amount of lithium grease to the sides of the trigger blade.
11:32 Insert into the bottom of the trigger housing ensuring the hole in the trigger blade aligns with the rearmost hole in the trigger block. Secure with a pin.
Trigger replacement earlier rifles the spring is one screw further forwards
11:46 Add a small amount of lithium grease to the plate at the back of the rifle.
11:54 Insert the screw through the safety plate with the lugs on the plate facing outwards. Screw into the back of the rifle. Tighten with a flat bladed screwdriver. The plate itself will rotate freely at this stage.
12:19 Insert the ball bearing into the spring detent having first added a small amount of lithium grease to the top of the spring.
12:36 Use a small flat bladed screwdriver to push to ball bearing on top of the spring and into the hole, rotating the safety plate on top of it.
Safety catches have this ball and spring which are easy to lose
12:54 Huntsman HH.
13:01 Insert the small grub screw into the side of the trigger assembly using a 1/16 allen key.
13:10 Insert the hammer and hammer spring into the open end of the trigger assembly.
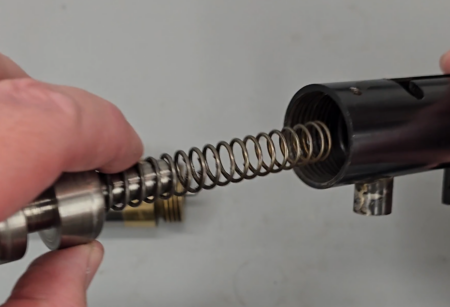
Hammer and spring replacement on the HH
13:20 Screw the trigger assembly into the main cylinder, making sure the two holes align with the transfer port.
On HH the rear body is an assembly
INSTALLING BREECH BLOCK ONTO THE MAIN RIFLE ACTION
13:42 Huntsman HH.
13:44 Put a small amount of silicon grease onto the ‘o’ ring and install into the hole in the brass section.
13:58 Insert the muzzle end of the barrel through the barrel band and ensure the two holes at the rear of the breech align with the holes on the action.
14:12 Install the two flat headed screws in the rearmost holes of the breech and the two capped screws into the two holes at the front of the breech. Tighten, but not fully, the front screws using a 3/32 allen key. Tighten the rearmost screws using a flat headed screwdriver, then tighten the front to screws.
HH breech replacement
15:04 Insert the small grub screw at the front of the barrel band, tightening with a flat headed screwdriver.
15:20 Attach any ½ UNF silencer adapter by screwing it onto the end of the barrel.
Some rifles have a UNF thread adaptor
15:31 Insert the pellet probe into the rear of the breech adding a small amount of moly grease or light lithium grease to the outside of the probe.
15:59 Ensure the hole in the pellet probe aligns with the slot in the side of the breech block then install the cocking dog using a flat bladed screwdriver. You can add a small amount of blue Loctite to the cocking pin at this stage.

HH bolts are a larger diameter
16:37 Huntsman mk 2.
16:53 Add a small amount of moly or light lithium grease to the bolt and insert into the back of the rifle, ensuring the dimple at the rear of the bolt is aligned with hole in the side of the block.

MK2 bolt reassembly
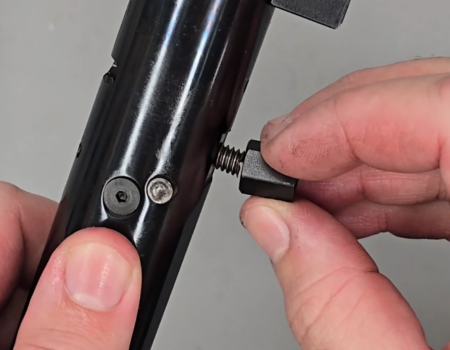
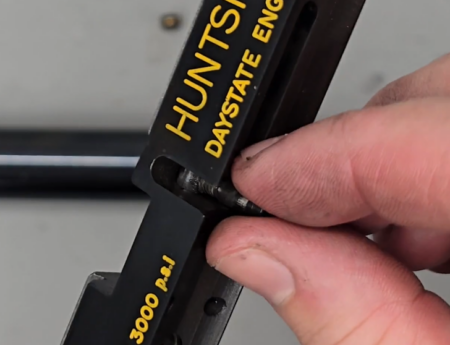
17:33 Insert the small ball bearing in the hole followed by the spring and then secure by adding the grub screw and tightening with a 1/16 allen key. Do not over tighten. You can add a small amount of blue Loctite at this stage to prevent the grub screw working loose.

Bolt detent spring should not be tight
18:29 Insert the cocking dog into the probe via a hole on the underside of the slot on the side of the block. Tighten with a flat bladed screwdriver. Add a small amount of blue Loctite at this stage.
Bolt retaining pin on the MK2 should have engineering adhesive applied
18:59 Add a small amount of silicon grease to both the ‘o’ rings on the transfer port piece and insert into the transfer port hole on top of the main block.
MK2 transfer port usually have a brass spacer and 2 ‘o’ rings
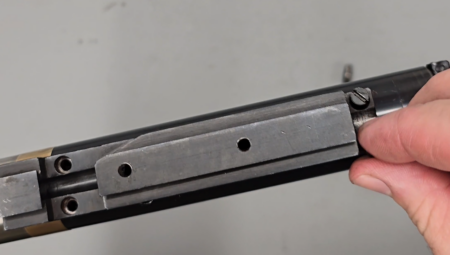
19:18 Lay the breech block and barrel on top of the main block ensuring the holes are aligned.
19:34 The longer two of the screws are inserted at the rear of the action and the shorter ones at the front. Tighten with a 3.32 allen key.
20:03 The barrel band support can be added at the muzzle end of the rifle by sliding it over the barrel and cylinder. Secure with the three screws using a 1/16 allen key.
PLACING ACTIONS INTO THEIR STOCKS
20:53 Align the stocks with the underside of the actions and secure by tightening the stock bolt using a 3/16 allen key.
Stock bolt replacement